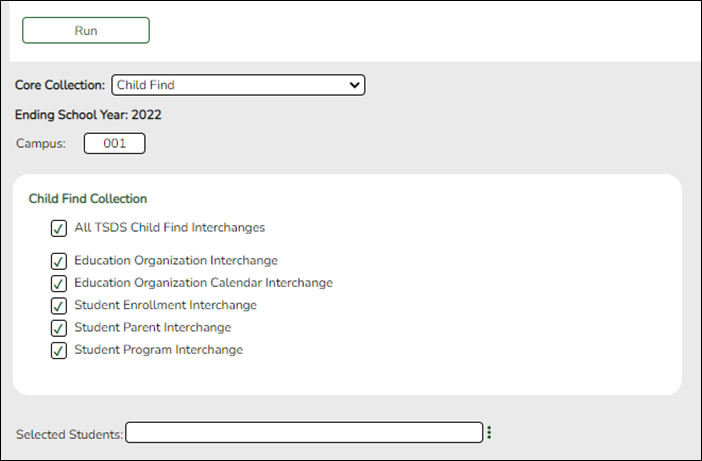
Core Collection: Child Find
Child Find is a federal mandate under the Individuals with Disabilities Education Act (IDEA). It requires local education agencies (LEAs), which include public school districts and charter schools, to identify, locate, and evaluate all children with disabilities residing within their jurisdictions who need special education and related services (34 CFR §300.111—Child Find). This program covers students from birth through age 21 and includes students for whom the special education evaluation process was completed.
This process includes children who are:
- Enrolled in a public school and are advancing from grade to grade
- Parentally placed in a private school, homeschool, or attend a virtual school
- Highly mobile, including migrant children
- Homeless
- In foster care or unaccompanied youth
- Wards of the state
- Involved in the criminal justice system
- Residing in nursing homes
For additional information, see the Child Find website.
NEW FOR 2023-2024:
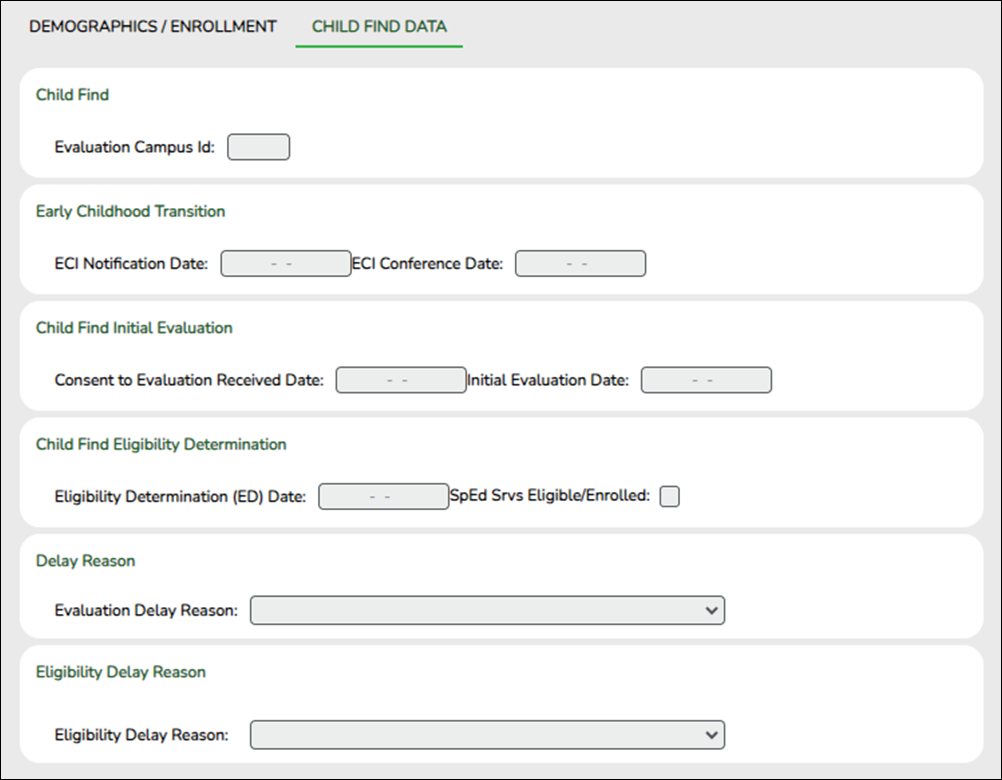
❏ Added INSTRUCTIONAL-PROGRAM-TYPE (E1600) (Code Table C215) indicates the type of attendance program associated with a calendar.
❏ Added ORIGINAL-ECI-SERVICES-DATE (E1737) indicates the month, date, and year when an infant or toddler, from birth through age 2, became eligible to participate in the early childhood intervention program.
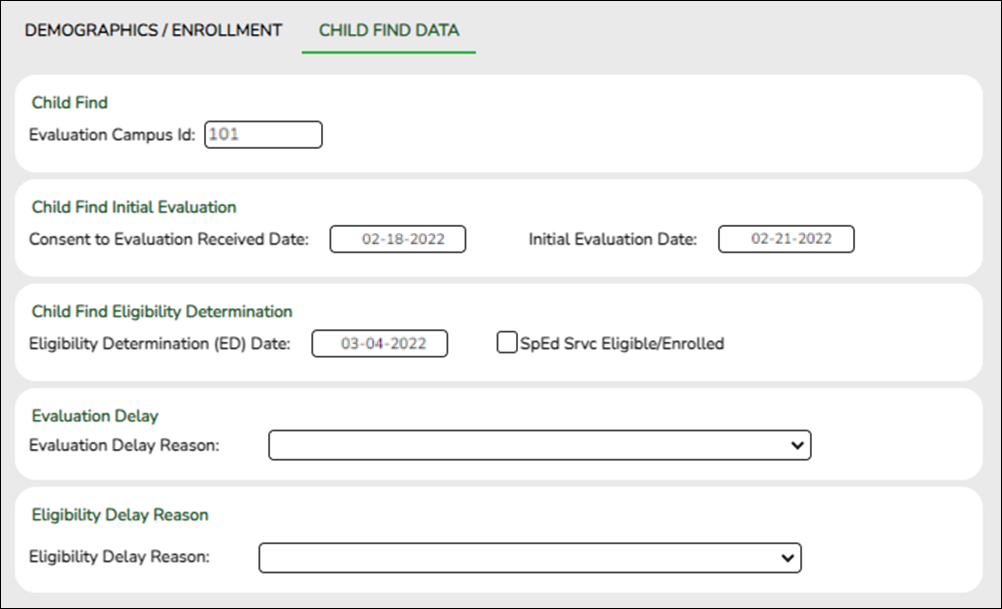
❏ Added CONSENT-TO-EVALUATION-RECEIVED-DATE (E1738) indicates the month, day, and year the Local Education Agency (LEA) received written consent for the full individual and initial evaluation (FIIE) from the student's parent.
❏ Removed PARENTAL-CONSENT-DATE (E1714) indicates the month, day, and year of the first instructional day following the date on which the Local Education Agency (LEA) received written consent for the full individual and initial evaluation (FIIE) from the student's parent. The date entered for this data element counts as day 1 of the timeframe required for completing the FIIE.
IMPORTANT: Each LEA will have unique situations. Some of the dates, images, and examples provided in this document are for informational and instructional purposes only and may not completely represent your LEA's process.
Registration
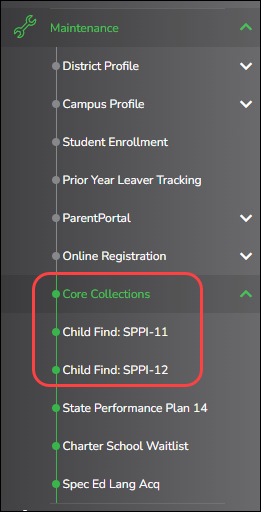
Registration > Maintenance > Core Collections
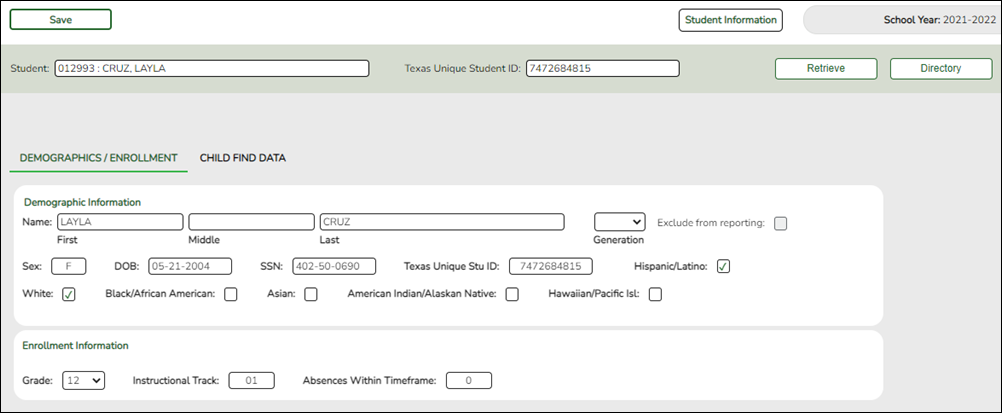
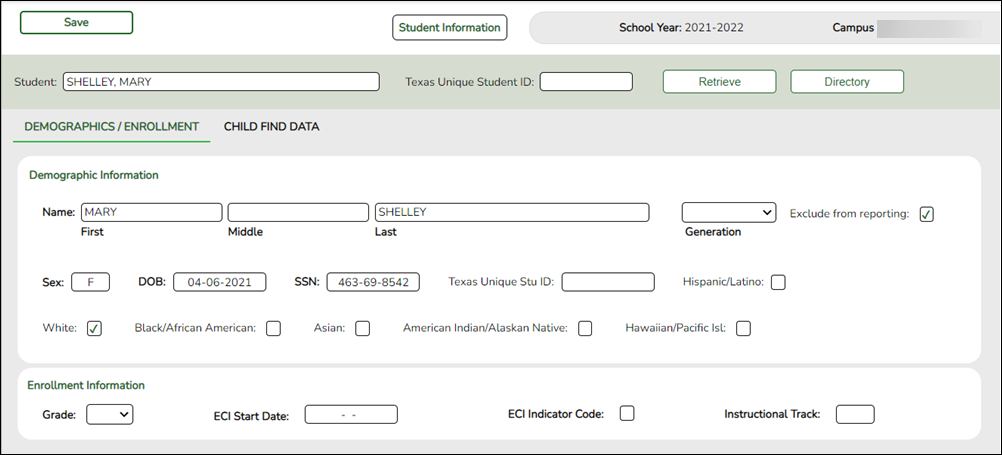
Child Find SPPI-11 and Child Find SPPI-12 are located under Registration > Maintenance > Core Collections. There are four scenarios for reporting students:
• Child Find: SPPI-11 Scenario 1 for Enrolled Students, ages 3-21
• Child Find: SPPI-11 Scenario 2 for Non-Enrolled Students, ages 3-21
• Child Find: SPPI-12 Scenario 3 for Enrolled Students, ages 0 and up to, but not including, 3.
• Child Find: SPPI-12 Scenario 4 for Non-Enrolled Students, ages 0 and up to, but not including, 3.
Reports
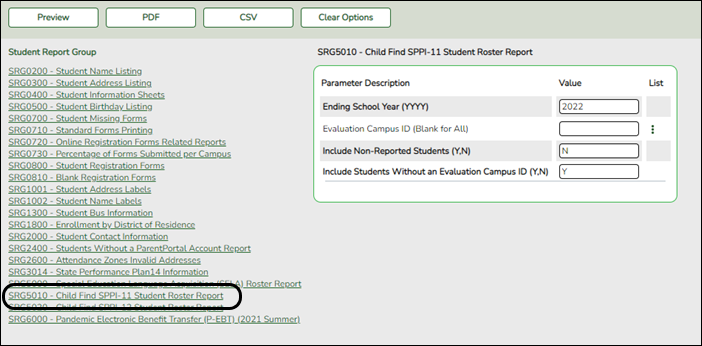
Registration > Reports > Registration Reports > Student > SRG5010 – Child Find SPPI-11 Student Roster Report
SRG5010 - Child Find SPPI-11 Student Roster Report gives a report of SPPI-11 students.
❏ In the Ending School Year (YYYY) field (Required), type the four-digit school year. For example, for the 2021-2022 school year, type 2022.
❏ In the Evaluation Campus ID (Blank for All) field, type the three-digit campus ID where the student was evaluated, or leave blank to create a report for all campuses. If creating the report for all campuses, the report is organized by Evaluation Campus ID, not by Enrolled Campus ID.
❏ In the Include Non-Reported Students (Y,N) field, type Y or N to include/exclude non-reported students.
❏ In the Include Students Without an Evaluation Campus ID (Y,N) field, type Y or N to include/exclude students without an Evaluation Campus ID.
❏ Click Preview.
Students without an Evaluation Campus ID will display on the first page of the report followed by listings for each evaluating campus.

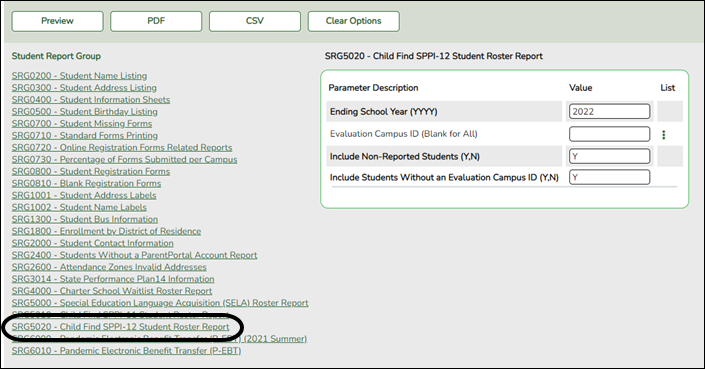
Registration > Reports > Registration Reports > Student > SRG5020 – Child Find SPPI-12 Student Roster Report
SRG5020 - Child Find SPPI-12 Student Roster Report gives a report of SPPI-12 students.
This report displays one listing per student for every ECI record on Spec Ed. For example, if a student has three ECI records, they will appear in the report three times, one time for each ECI record.
❏ In the Ending School Year (YYYY) field (Required), type the four-digit school year. For example, for the 2021-2022 school year, type 2022.
❏ In the Evaluation Campus ID (Blank for All) field, type the three-digit campus ID where the student was evaluated, or leave blank to create a report for all campuses. If creating the report for all campuses, the report is organized by Evaluation Campus ID, not by Enrolled Campus ID.
❏ In the Include Non-Reported Students (Y,N) field, type Y or N to include/exclude non-reported students.
❏ In the Include Students Without an Evaluation Campus ID (Y,N) field, type Y or N to include/exclude students without an Evaluation Campus ID.
❏ Click Preview.
Students without an Evaluation Campus ID will display on the first page of the report followed by listings for each evaluating campus.
State Reporting
State Reporting > Utilities > Create TSDS Core Collections Interchanges
The Campus ID in this screen runs the interchange by the enrollment campus, not by the evaluation campus.
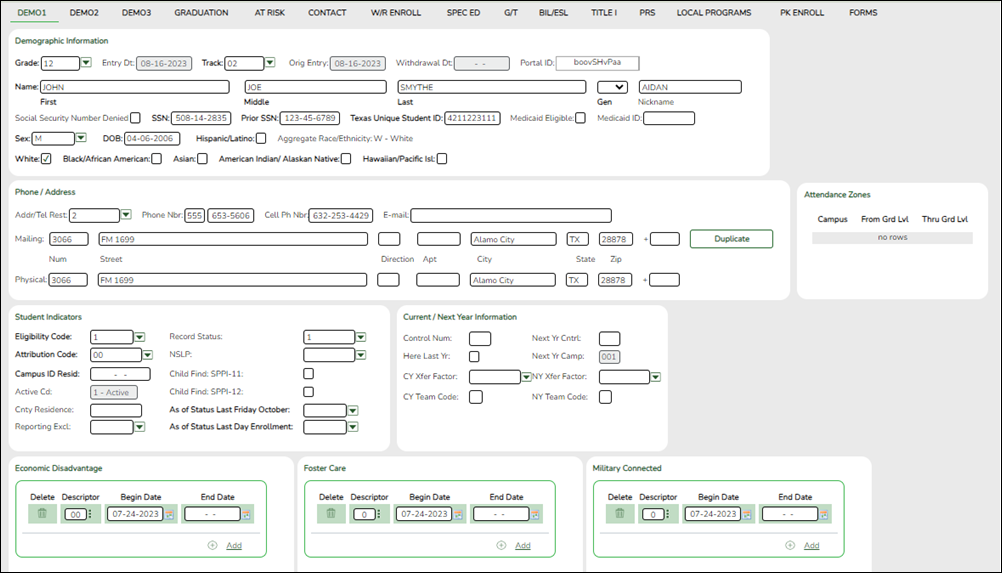
The Child Find SPPI-11 and Child Find SPPI-12 Indicators from Demo1 are used to identify SPPI-11 and SPPI-12 students and will not extract.
It is recommended to run the interchanges with Campus set to blank to ensure all students are reported regardless of Campus Evaluation ID or Campus Enrollment ID.
NOTE: The STUDENT-ABSENCES-WITHIN-TIMEFRAME calculation in the Student Program Extension Interchange does not include absences from prior year.
For the 2023-2024 school year, this data will need to be manually updated in the interchange.
| Collection |
Select the submission type. For the Child Find submission, select Child Find. |
|---|---|
| Ending School Year |
(Display only) The submission year, as entered in the Submission Year field on State Reporting > Options, is displayed. |
The interchanges are listed according to the Core Collection field.
❏ Select All TSDS Collection Interchanges (e.g., All TSDS Child Find Interchanges) to create all interchanges for Child Find.
Or, select the individual interchange you want to create.
| Selected Students |
The field is enabled if you selected all interchanges or a student-related interchange. Type or click the ellipsis to select the students for whom you want to create an interchange. Separate multiple students (Texas unique student IDs) with a comma (e.g., 6895409515,1628657282,2986961713). Leave blank to select all students. |
|---|
❏ Click Run.
When the process is complete, you are prompted to save a .zip file containing the individual files for the completed interchanges.
The default name of the zipped folder is District_YYYY-MM-DD.HH-MM-SS.TSDS.zip, where:
- District is the six-digit county-district number
- YYYY-MM-DD is the date when the folder was created
- HH-MM-SS is the hour, minute, and second when the folder was created
Example: 015102-2020-01-15.15-30-22.TSDS.zip
The default name for the individual files is District_Campus_Collection_TimeStamp_Interchange.xml, where:
- District is the six-digit county-district number
- Campus is the three-digit campus ID
- Collection is the nine-character collection (ending school year & submission)
- TimeStamp is the 12-digit date-time-stamp when the interchange was created (YYYYMMDDHHMM)
- Interchange is the name of the interchange created.
Example: 120120_000_2019TSDS_202002030954_InterchangeStudentParentExtension.xml
❏ If errors are encountered:
- Correct the data in ASCENDER.
- Re-run the interchange(s).

