ASCENDER Business Overview
The ASCENDER Business System is a group of web-based applications that allow you to interact with the database using an Internet browser such as Firefox, Google Chrome, or Safari (Mac only). As the ASCENDER System evolves, the browser versions are updated.
Here are a few tips:
- For adequate viewing, be sure to check your screen resolution settings. The recommended screen resolution setting is 1280×1024.
- It is recommended that you clear your Internet browser’s cache each time a release is installed or updated.
- Be sure to access the ASCENDER Browser Settings document for the most current system browser settings information. This document can be found in the online Help.
- If you experience any issues or have questions, please contact your regional Education Service Center.
About Release Notes & Known Issues:
As the ASCENDER software programs are modified, release notes are posted in the corresponding Release Announcement at wiki.ascendertx.com. An ESC consultant login is required to access the Announcements page.
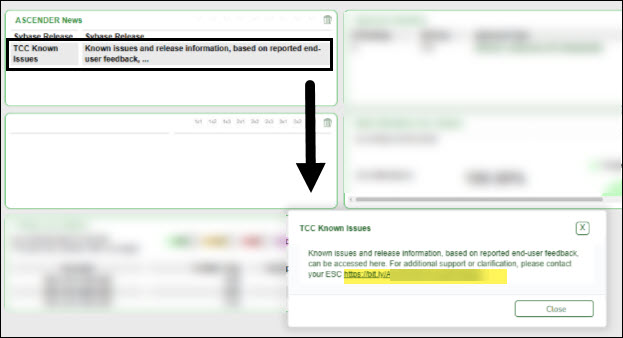
As known issues are identified, they are added to the TCC Known Issues Google document, which is accessible from the ASCENDER Homepage under ASCENDER News.
System Requirements and Browser Settings:
Periodically ensure that your system and browser settings meet the minimum requirements.
For information about system requirements and recommended browser settings, see ASCENDER Recommended Browser Settings.
ASCENDER Software Terminology:
System - The group of applications supporting a broad area of LEA or campus management, or a specific group of applications (e.g., Business, Student, State Reporting, OCR, District Administration, System Administration).
Page - Selected from a menu or submenu, a page may have multiple tabs, or it may stand alone. A page can have fields, buttons, grids, report parameters, and other features allowing you to accomplish one or more tasks.
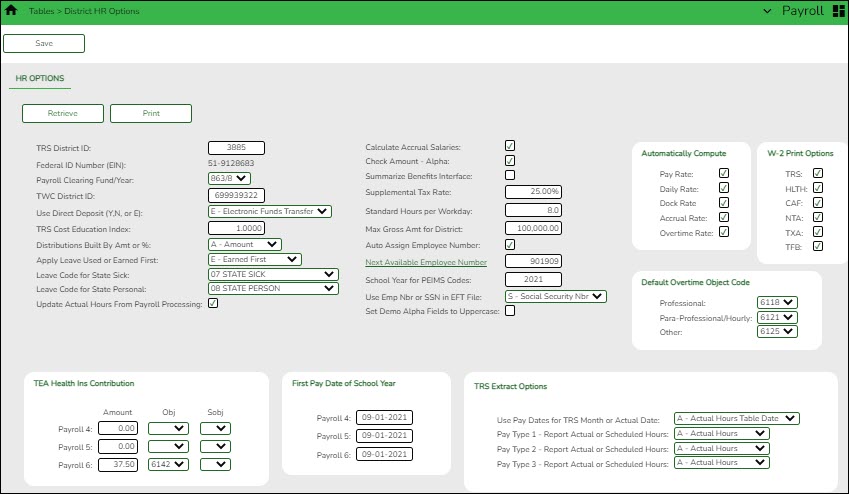
Tab - Some pages have multiple tabs allowing you to accomplish tasks that can be logically grouped together.

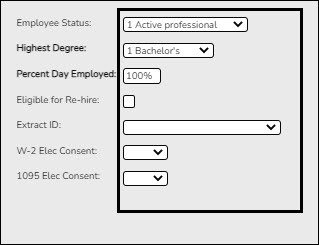
Field - A mechanism for inputting data, such as a text entry box, drop-down list, check box, or radio button. Each field has a label, such as the Employee Status field. Note that in ASCENDER online Help and other documentation, field names are displayed in bold font.
Upon initial log on to ASCENDER Enterprise, the End User License Agreement (EULA) for ASCENDER is displayed. Users must accept the agreement in order to proceed.
Login
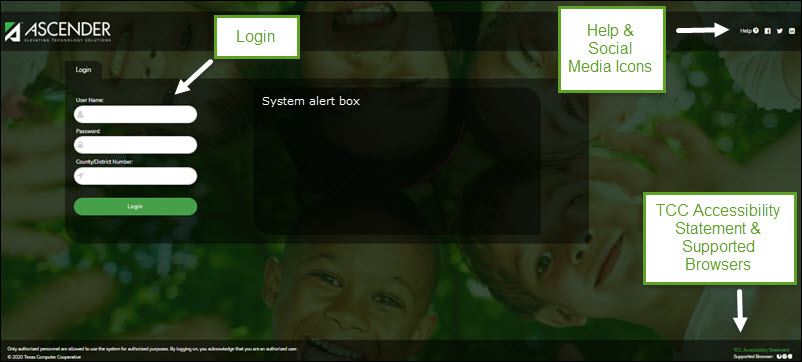
- Login Page:
Field Description User Name Type your user ID or name provided by your local education agency (LEA). Password Type your password. The text is displayed as black dots for privacy.
Requirements:
• 16-46 alphanumeric characters
• Three of the following: uppercase, lowercase, numeric, and special characters
• Case-sensitive
Other password requirements such as the number of invalid password attempts, lockout period, and the number of password expiration days are set by your district administrator.County/District Number Type your six-digit county-district number. Browser Requirements The currently supported browsers are listed. Social Media Icons Click to access various social media sites for ASCENDER. Click Login or press ENTER to complete the login process. The ASCENDER Homepage is displayed.
- Change Password:
Change Password
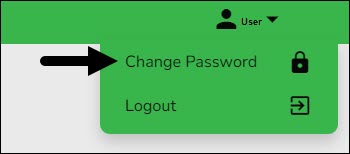
To change your password, from the ASCENDER Homepage, click
 next to your user name and then click Change Password.
The Change Password page is displayed.
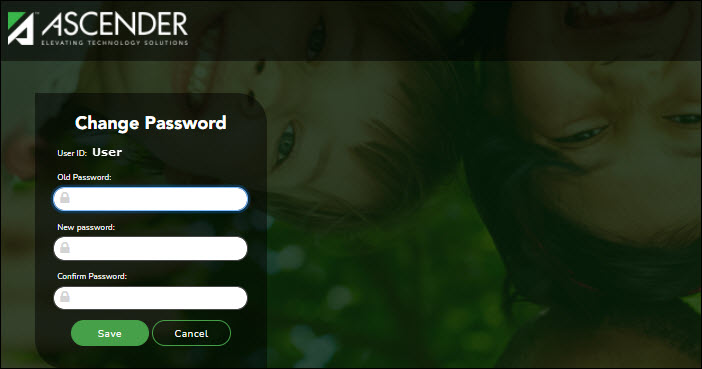
User ID Displays your LEA-issued user ID. Old Password Type your old (current) password. New Password Type a new password.
Requirements:
• 16-46 alphanumeric characters
• Three of the following: uppercase, lowercase, numeric, and special characters
• Case-sensitiveConfirm Password Retype your new password to confirm. Click Save to save your new password.
Click Cancel to cancel the request and return to the ASCENDER Homepage.
- Exit & Logout:
It is important to exit and log out correctly to ensure that the software functions properly.
Exit Application
To exit any open application, in the top-right corner of each application next to your user name, click
 .
.

An exit application page is displayed with a message indicating that you have logged out successfully and you may close the browser tab.

Logout
From the ASCENDER homepage, in the top-right corner of the page next to your user name, click
 and then click Logout.
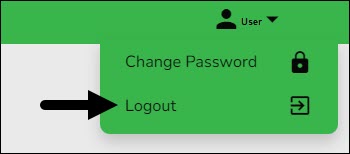
The Logout page is displayed confirming that you have logged out of ASCENDER successfully.

Click Back to Login to return to the ASCENDER Login page.
Incorrect Logout Method
It is important to remember that if you click X on your browser to exit an application or log out of ASCENDER, various issues including table locks in the system can occur. You must contact your technical department for further assistance, which may include disconnecting the connection in Sybase to clear the table locks.
Navigation
- ASCENDER Homepage & Quick View Dashboard:
ASCENDER Homepage & Quick View Dashboard
Depending on your user profile, ASCENDER offers a Quick View dashboard that is used to display important information from multiple sources in one, easy-to-access place. Currently, the following dashboard elements are available for Business users:
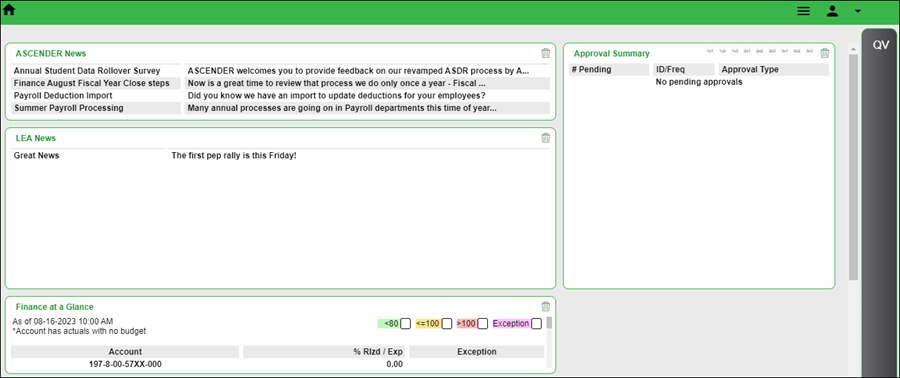
- ASCENDER News - (All users) Displays important announcements or upcoming events. The ASCENDER News is managed by the Texas Computer Cooperative (TCC).
- Each news entry displays a topic and a description. An ellipsis (…) is displayed at the end of the description indicating that additional details are associated with the entry.
- If there are no news entries to display, a message is displayed prompting you to stay tuned for upcoming news.
- LEA News - (All users) Displays important announcements or upcoming events directly from the LEA. The LEA News is managed by the local education agency (LEA) in District Administration.
- Each news entry displays a topic and a description. An ellipsis (…) is displayed at the end of the description indicating that additional details are associated with the entry.
- If there are no news entries to display for the current date range or if you do not have permission to the application or breadcrumb (menu item) associated with the entry, the following message is displayed: “No news is good news”.
- Finance at a Glance - (Business users with permission to Finance, Purchasing, or Warehouse) Displays a personalized summary of accounts based on your user profile in District Administration. The Finance at a Glance will display a percentage of received/spent monies based on your user profile. This percentage can be filtered for expenditures less than 80 percent, between 80 percent and 100 percent, greater than 100 percent, and those accounts that have spent money with no budget. Accounts are summarized by fund/year, function, major object (first 2 digits), and organization. The table displays the Account, % Rlzd / Exp, and Exception columns.
- This data is retrieved from the general ledger balances in Finance file ID C and is sorted by account code.
- Only account classes 5XXX, 6XXX, 7XXX, and 8XXX are included.
- The table is updated on an hourly basis (at the top of the hour).
- The following filters are available to view selected accounts and are highlighted with a corresponding color. Select the filter checkboxes as needed to narrow the display of accounts in the table.
- >80 (green)
- < =100 (yellow)
- >100 (red)
- Exception (purple)
- Approval Summary - (Business users) Displays a list of pending approval items based on your user's profile. If there are no approvals, a message is displayed indicating there are no pending approvals.
All ASCENDER users created in Security Administration are automatically granted permission to view all dashboard elements. However, the content within the dashboard element is driven by your user profile (Profile Name) in Security Administration with the exception of ASCENDER News, which is available to all users. The LEA News may be limited to certain users based on the LEA's preferences when adding the news entry in District Administration.
Each dashboard element tile is enabled with the drag-and-drop feature along with row x column layout options to allow you to customize the layout of your dashboard elements. Your selected layout preferences are automatically saved upon logging out of the software.
Drag-and-Drop Feature
Use the drag-and-drop feature to define the placement of the dashboard element tiles.
- Press and hold down the left mouse button on the desired element tile to “Grab” it.
- “Drag” the element tile to the desired location.
- “Drop” the element tile by releasing the mouse button.
Column x Row Layout OptionsUse the following layout options located at the top of each dashboard element tile to adjust the size (column = width and row = height) of the element tile. To view these options, use your mouse to hover over the top-right corner of the element.

- 1×1 = 1 column x 1 row
- 1×2 = 1 column x 2 row
- 1×3 = 1 column x 3 row
- 2×1 = 2 column x 1 row
- 2×2 = 2 column x 2 row
- 2×3 = 2 column x 3 row
- 3×1 = 3 column x 1 row
- 3×2 = 3 column x 2 row
- 3×3 = 3 column x 3 row
Below is just one example of the many dashboard formats available using the drag-and-drop feature and the column x row layout options:
- ASCENDER News - 2×1
- Approval Summary - 1×1
- LEA News - 2×1
- Finance at a Glance - 2×1

Delete an element:
If you do not want an element displayed on your dashboard, you have the ability to move it out of view to the Quick View or QV column, which is the gray column located along the right side of the page.
Collapsed Quick View

Expanded Quick View
Below is an example of the Approval Summary element tile being deleted from the main dashboard view and moved to the Quick View.

Note: At any point, you can use the drag-and-drop feature to move elements from the Quick View back to the main dashboard view.
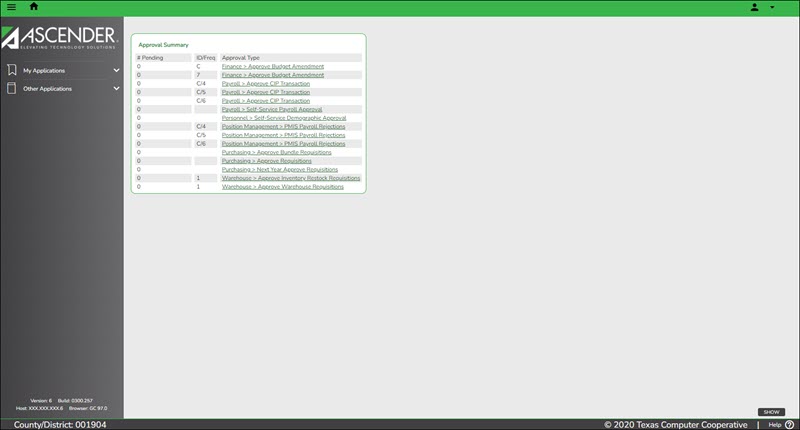
Approval Summary
All users are granted permission to the Approval Summary dashboard element, which provides a list of pending approval items based on the user's profile. If there are no approvals, a message is displayed indicating there are no pending approvals.
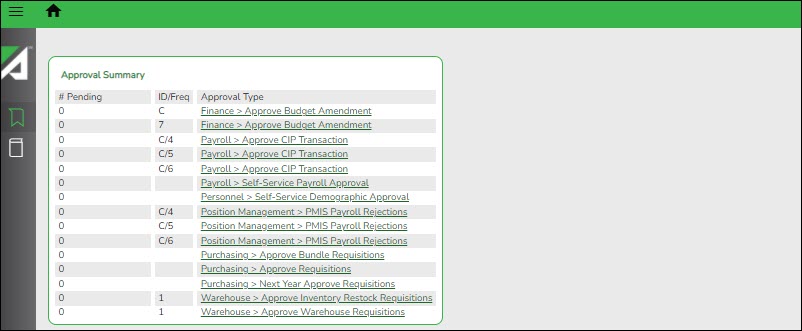
Click here for a complete list of approval types that are included in the Approval Summary (based on your user profile).
# Pending Displays the number of pending approval items for the corresponding approval type. ID/Freq Displays the ID or pay frequency tied to the pending item, if applicable. Approval Type Displays a link to the page where you have pending approval items. 
In this example, the user has a pending approval for a CIP transaction.
❏ Click the link. The selected application page opens in a separate browser window.
❏ Perform the necessary action to satisfy the pending item(s).
❏ Log out of ASCENDER and then log back in to refresh the homepage.
If there are no other pending approvals, a message is displayed indicating there are no pending approvals.
- Applications:
The ASCENDER homepage serves as a personalized dashboard and displays links to all ASCENDER applications that are tied to your user profile.
The main menu is located on the left side of the page. In the upper-left corner, click
 to collapse the main menu or expand the main menu. This functionality is available on all pages in all applications. And, on some pages must be used for a more favorable view of the actual page.
Collapsed view - The main menu is hidden.
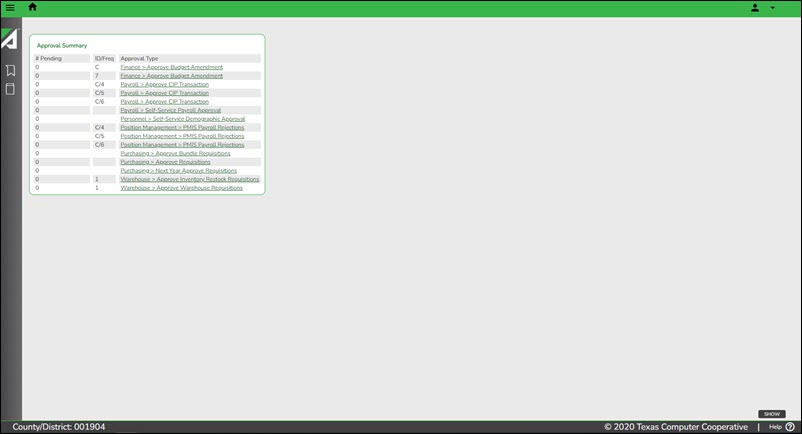
Expanded view - The main menu is open.
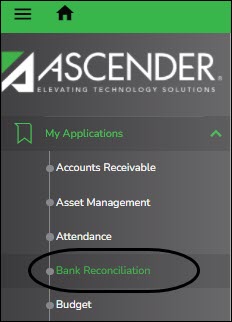
Depending on your view, click or My Applications to view a list of applications to which you have rights.
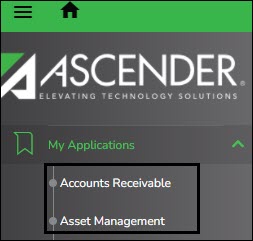
All other applications are listed under Other Applications. Click to view a list of other applications to which you do not have rights.
Access rights for each application must be set in Security Administration by a user with access to that system.
If you attempt to open an application you do not have rights to, the following page is displayed:

Click Exit to return to the ASCENDER homepage. - Menu & Tabs:
Menu and Tabs
After you select an application from the ASCENDER homepage, the application homepage is displayed. In the below example, the Payroll application is selected.
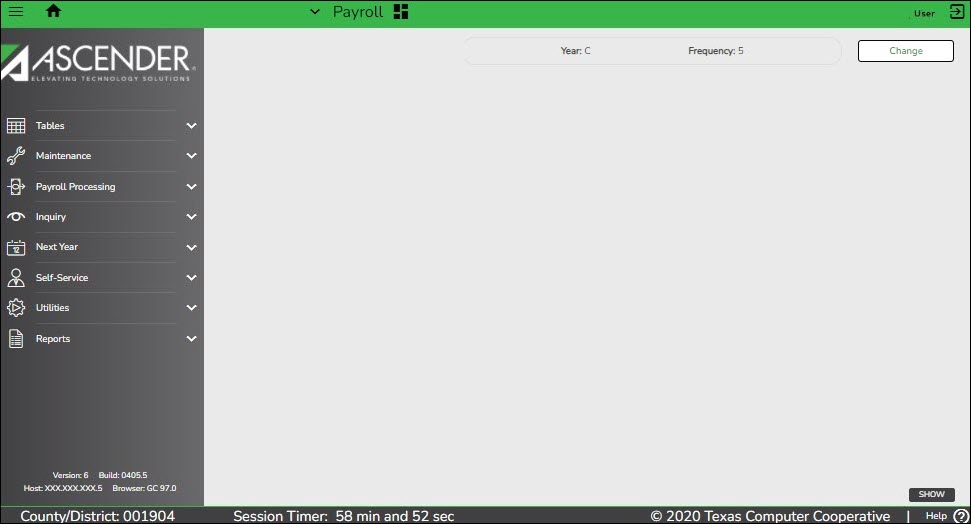
Select a main menu item (e.g., Tables, Maintenance, Inquiry, etc.). The available submenu options are displayed. Use the gray scroll bar to scroll up and down and view any additional submenu options.
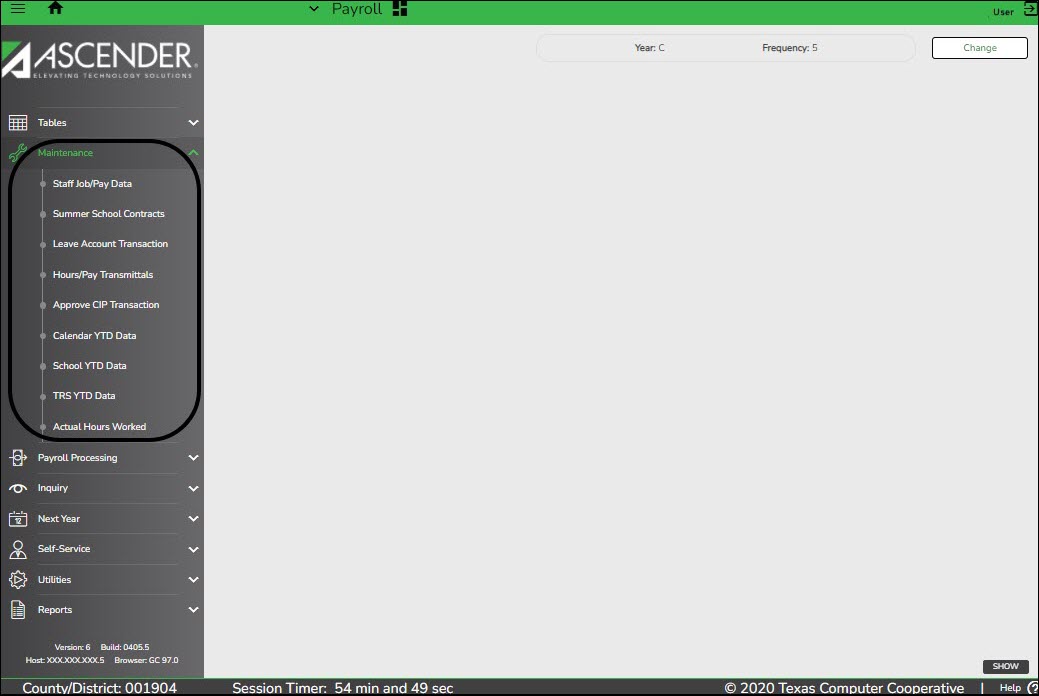
Select the menu or submenu options for the page you want to display.
Many pages consist of multiple tabs. Click the tab to be displayed. You will notice a difference in font color. The tab that is currently open on the page displays in green font and is underlined. All other tab names are black with no underline. Click another tab name to view data on a different tab.

If a tab is disabled (grayed out), you may not have security permission to access the tab, the tab may not be available in the setting (year or pay frequency) to which you are logged on, or a process on another tab may need to be performed before the tab is enabled.For example, the Leave Balance tab is disabled when a user is logged on to the next year pay frequency.

Change Application
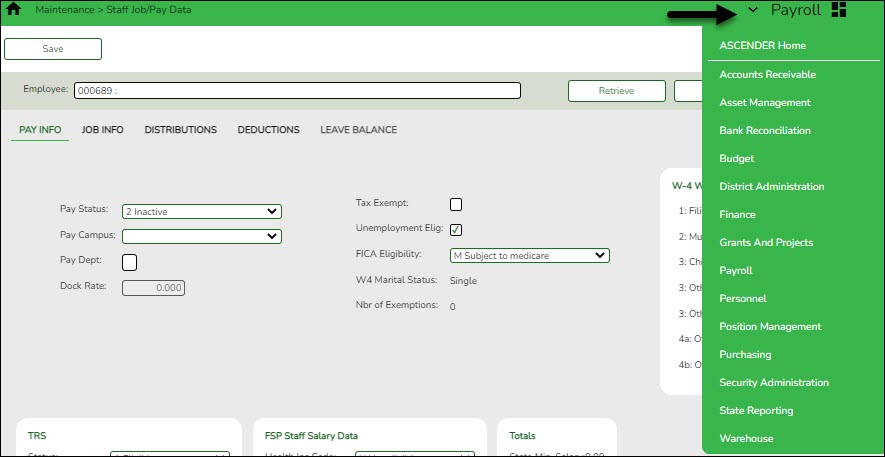
From any application page, you can open a new application. At the top of the page next to the open application name (in this case Payroll), click
 . A list of all ASCENDER applications is displayed in alphabetical order. Select the application you want to open. A separate browser tab opens with the newly selected application homepage.
Application Tabs
Open applications are set up to display as separate browser tabs so you can easily navigate from one application to another.

If you have multiple applications open, you can navigate to an open application without exiting from any one application by selecting the associated browser tab located at the top of the page.
Note: The session timer operates separately for each application, which may cause you to receive a session timeout message from one application while you are in another application.
Review the Session Timers section for more information about setting up session timers.
Multiple pages (i.e., menu items) cannot be displayed within an application. When a new menu selection is made, the current page is no longer displayed. If data modifications are made on the page and the changes are not saved, an unsaved data warning message is displayed. You can select to leave the page without saving the changes or remain on the page to continue making changes or save the changes on the page.
- Change File ID, Accounting Period, or Payroll Frequency.
Change Feature
In the top-right corner of the page, the Change feature allows you to change the file ID, year, accounting period, payroll frequency, and warehouse ID. This feature is only available if you are logged on to the following applications:
- Asset Management (file ID)
- Budget (file ID)
- Finance (year and accounting period)
- Payroll (year and frequency)
- Position Management (year and frequency)
- Warehouse (warehouse ID)
Depending on the application to which you are logged on, click Change to enable the applicable change fields.

Depending on the application, the drop-down field(s) are enabled. Click
 to view a list of the applicable years, file IDs, accounting periods, or payroll frequencies.
Select the applicable option(s) and click Apply. The application data changes to match your selection.

Click Cancel to cancel the changes. - Software Version:
Software Version
The following information is displayed at the lower-left corner of the page under the main menu.

Version Displays the ASCENDER software version. Build Displays the ASCENDER software build number. Host Displays the software server host information. Browser Displays the browser and version details (e.g., Google Chrome Version 85.0). - County District:
County District
The following information is displayed in the lower-left corner of the page under the software version details.

County/District Displays the county district number to which you are logged on. To change this number, log out and log back in with a different number. - System Alerts:
System Alerts
At the bottom of each page, there is an orange message line that displays any system alerts.
Click Hide to hide the message line. The message line will remain hidden as you navigate to other tabs within the same page. The message line will show again if you navigate to a new menu item or when a record is saved.

Click Show to show the message line.

- Online Help:
Online Help
Access the ASCENDER online Help by clicking the Help button in the lower-right corner of the page.

The Help topic is specific to the application page. You can browse other Help topics from the Help window. Online Help is available for all applications and is page sensitive. Additionally, you can access a variety of process-specific guides and checklists in the Online Help.Review the ASCENDER Online Help page for more information.
- Homepage Timer:
Homepage Timer
The ASCENDER Homepage has a 300-minute session timer. This timer redirects the user to the ASCENDER Login page and requires them to log on again if they attempt to launch an application after 300 minutes of inactivity on the homepage. This timer cannot be modified.
Note: This timer is separate from the individual application session timers that are set up in District Administration.
- Session Timers:
Session Timers
Across the bottom of each application page, a session timer is displayed. As each page is displayed, the timer resets.

Review the Session Timers Help page in District Administration for more information about session timers.
Retrieve & Maintain Data
From each page or tab, data can be retrieved, viewed, added, deleted, and modified using the following tools:
- Auto features:
Autotab
The autotab feature eliminates the need to manually click in or tab to the next field. Instead, the next defined text field automatically receives the cursor focus when the maximum number of characters in the current text field is reached.
In the example below, as you type a 20-digit account code number in nine separate boxes, you do not need to tab to each box. If you type a three-digit fund number in the Fund field, the cursor focus automatically tabs to the next field and so on.

When the cursor moves to a new field, all of the characters in that field will be highlighted.If you are replacing the data, on your first keystroke of the new data, all of the old data will be deleted, and you can type the new data.
You may also use your arrow keys to move to any specific part of the data in the field to update or replace the data, such as spelling or changing numbers in a sequence.
Autosuggest
The autosuggest feature allows you to type in specific data, as you type the data, a drop-down list of corresponding data is displayed. You can make a selection from the drop-down list, scroll through the drop-down list, or type new data in the field.

Depending on the field and page, press the SPACEBAR to view a list (in some cases limited) of available options for the field. - Add and delete rows:
Add a Row
In a table or grid, click +Add to add a new data entry row. A new row is added to the bottom of the grid or list.

Delete a Row
Click
 to delete a row. This icon is displayed next to any row that can be deleted. The row is shaded red to indicate that it will be deleted when the record is saved.
If you do not want to delete the selected row, click again to unselect the row for deletion.

If restrictions exist, a message is displayed indicating the reason. - Column sort:
Column Sort
When a column heading is underlined, the column can be sorted. Click the column to sort the data in ascending order, and then click the column again to sort the data in descending order.

 - indicates that the column is sorted in ascending order
- Pagination:
Pagination
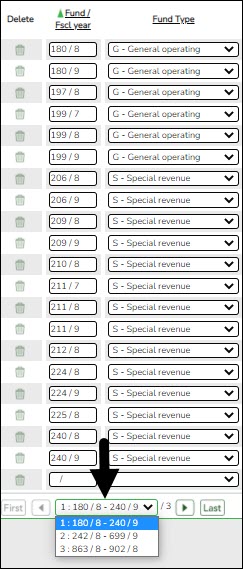
Depending on the page, approximately 30 rows of data is displayed or can be viewed with the use of the scroll bar. If the data exceeds the number of rows that can be displayed on the page, the page numbers are displayed on the bottom-left side of the page.

You can view and select which pages to display from the drop down. Or, you can click the arrow icons on either side of the page numbers to move between pages.
The pagination feature on some pages includes the range of data per page. In the below image, the page is sorted by Fund so each page displays the fund range listed on that page so you can find funds 180-240 on page 1 and so on.
You can navigate between pages by using the below buttons: - Ellipsis icon:
Ellipsis Icon
The ellipsis icon is displayed next to a field and remains on the page at all times. You do not have to tab into the field for it to be displayed.
Click to display a pop-up window with data that corresponds to the field.
Click the link of the option to be populated in the field.
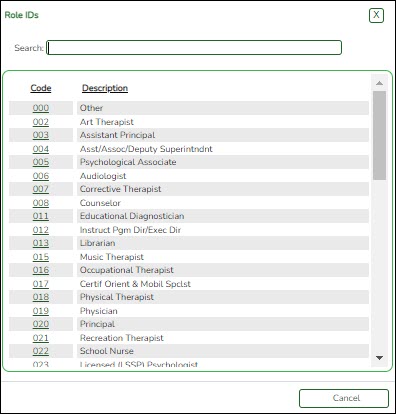
Otherwise, click Cancel or X to close the pop-up window without making a selection. - Spyglass icon:
Spyglass Icon
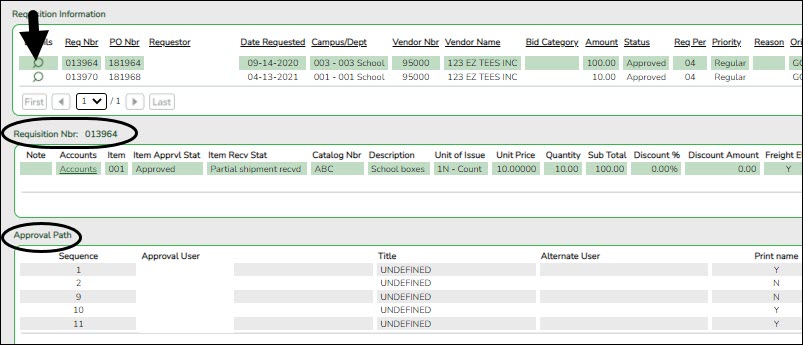
The spyglass icon is used on several pages to view additional details for a record.
Click to view additional details. The details are displayed in various ways depending on the application page. On some pages, a pop-up window opens with the corresponding details, and on other pages, additional details might be displayed in a different grid as seen in the below example.
- Save changes:
Save Changes
To save changes on a page, click the Save button. You can also press ENTER on your keyboard to retrieve or save, depending where you are on the page.
If you are in a search area of the page, the retrieve feature is the default setting when you press ENTER.
If you are in the body of the page, the save feature is the default setting when you press ENTER.
Reports
Numerous reports are available in ASCENDER. Most applications also offer a Create Report page allowing you to create customized reports.
- Generate a Report:
Generate a Report
Select a report:
All available report names are displayed on the left side of the page. The list of available reports remains displayed on the page even after you select a report name. This allows you to select another report within the selected reports menu without exiting the report page.
❏ Click a report to select it. The parameters for the selected report are displayed on the right side of the page.
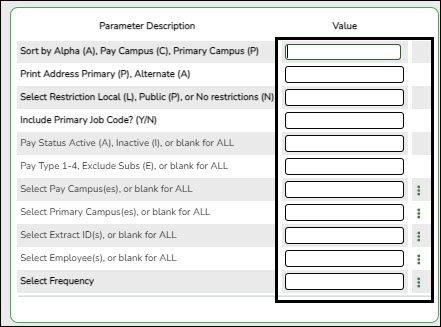
❏ Type or select the report options. Parameters in bold are required.
❏ Use the buttons located at the top of the page to generate the report.If the button feature does not apply to the selected report, it is disabled. For example, a certain report may not be available in the CSV format, so the CSV button will be disabled when that report is selected.
- Preview - Click to generate the HTML view of the report.
- PDF - Click to generate a PDF file of the report.
- CSV - Click to generate a CSV file of the report.
- Clear Options - Click to clear data from all parameter fields.
Review, save and/or print the report:
Review the report using the following buttons:
Click to go to the first page of the report.
Click to go back one page.
Click to go forward one page.
Click to go to the last page of the report.
The report can be viewed and saved in various file formats.
Click to save and print the report in PDF format.
Click to save and print the report in CSV format. (This option is not available for all reports.) When a report is exported to the CSV format, the report headers may not be included.
Click X to close the report window. Some reports may have a Close Report, Exit, or Cancel button instead.
Sort and filter:
Some reports may or may not provide the sort and/or filter option.
Sort Sort report data: You can sort data to make it easier to review or find records in the reports. Not all reports allow this option.
From the report window, click Sort/Filter to open the Sort/Filter window. By default, the Sort Criteria section is expanded. If not, click Sort Criteria.
(Left grid) Columns Available for Sorting (Right grid) Sort Columns You can rearrange the columns to indicate the order in which you want the sort applied. Click a column name, and drag it up or down to a new location.
In the right grid, for each column, click to indicate if you want that data sorted in ascending (e.g., A-Z, 0-9) or descending (e.g., Z-A, 9-0) order.
To remove a column from the sort, select the column, and then click to move it back to the left grid.
Click OK to apply the selected sort criteria to the report.
Click Cancel to close the window without re-sorting.
Filter Filter report data: When you want to view only certain data, you may find it useful to filter the report data. You can use specific criteria to retrieve only the data that you want. Not all reports allow this option.
From the report window, click Sort/Filter to open the Sort/Filter window. By default, the Sort Criteria section is expanded. Click Filter Criteria to expand the Filter Criteria section.
If the report does not allow sorting, the Filter button is displayed instead of the Sort/Filter button, and sort criterion fields are not available.
Click Add Criterion to add new filter criteria. A blank row is displayed in the grid.
Field Description Column Select a column by which to filter the data. The drop down lists the columns that appear on the report. Operator Select an operator.
= Equals
≠ Not equals
‹ Less than
≤ Less than or equal to
› Greater than
≥ Greater than or equal toValue Type the value by which you want to filter. For example, if you selected a date in the Column field, type a date to view only data for a specific date. Other functions and features:
Add Criterion Add another row. Select the logical connector (AND or OR) in the Logical field. Continue adding rows as needed.
Using the AND operator limits search results, because the program looks only for records that contain both criterion. Using the OR operator expands search results, because the program looks for records that contain either one criterion or the other, or both.
Delete Selected Delete selected row. Select the row, and then click the Delete Selected button. The row is deleted from the filter criteria.
Click OK to apply the selected filter criteria to the report.
Click Cancel to close the dialog box without applying a filter.
Reset Reset report data. Click to restore the report to the original view, removing all sorting and filtering that has been applied.
Reset Reset report data: Click to restore the report to the original view, removing all sorting and filtering that has been applied.
- User Created Report:
Create a Report
Run a report from a saved template:
Report Template Begin typing all or part of the name of an existing report template, or press the space bar to view all the templates. As you begin to type, a drop-down list displays report templates with titles that match the letters you have typed. From the drop-down list you can select the template. Only templates you created are listed in the drop-down list.
If you do not know the name of the report template, click Directory to select a report template from the directory. From the directory, you can select templates you created as well as public templates.
Create a new template:
Report Template Type the name of a new report template. Only alphanumeric characters are allowed. If you type a name that is already used, it will overwrite the previous template.
Public Select to make the report accessible to other users. All users in the district who have access to this page will be able to use the template.
- After entering the title and selecting the columns to include, click Save.
Create a new report:
Report Title Type a title for the report, up to 35 characters.
- The fields are grouped by business table. Select the fields for which you want to print information. You can select an entire group of fields by selecting the group name (e.g., PMIS Position Distribution).
- Click Create Report to generate the report.

