Security Administration > Create/Edit Roles
This page is used to create new roles or edit existing roles. You can add or edit roles for which a security component is required. Additionally, you can establish permissions for the various roles; for example, you can assign a database administrator permission to the Finance application.
Create a role:
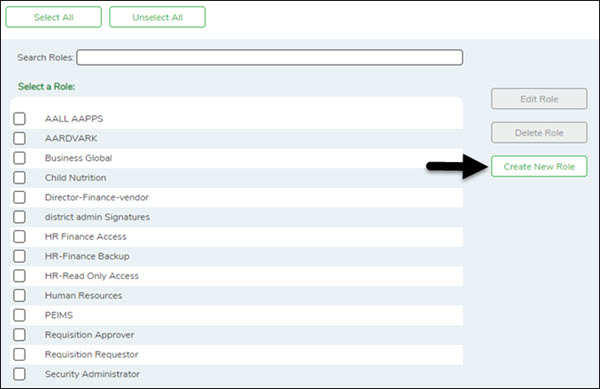
❏ From the Manage Roles page, click Create New Role.
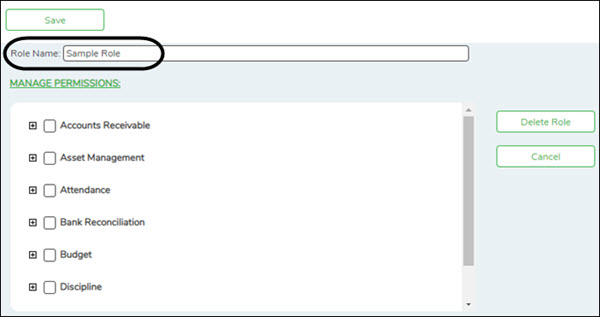
The Create Role page is displayed.
| Role Name | Type the name of the role to be created. |
|---|
❏ Under Manage Permissions:
- Click + - to expand or collapse available role permissions.
- Select the permissions to be added to the role. Once permission is granted to a component, the title is displayed in green and the associated check box is selected.
- Multiple applications can be added to a role.
- Multiple roles can be added to a user.
❏ Click Save. The new role is displayed under Select a Role.
You can continue creating roles as needed.
Edit a role:
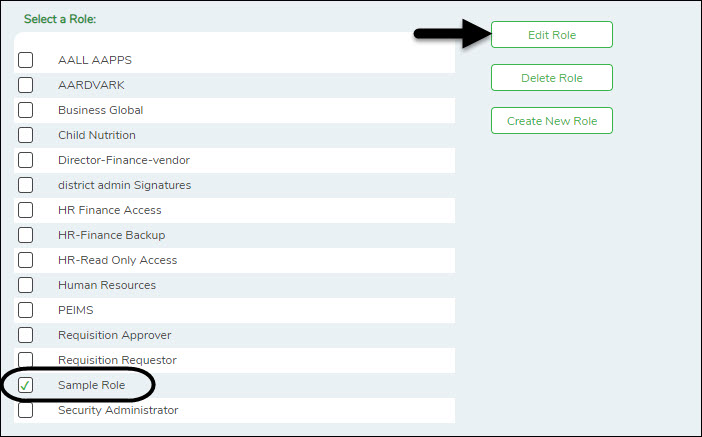
❏ From the Manage Roles page, you can type a role name in the Search Roles field. As you type the role name, the existing roles that match the typed data are displayed under Select a Role. The Edit Role and Delete Role buttons are enabled.
❏ Select the role to be edited.
❏ Click Edit Role to edit the selected role. The Edit Role page is displayed with the selected role name in the Role Name field and the existing role permissions.
❏ Under Manage Permissions, add or remove components (i.e., permissions to a page/menu). Any changes made to a role are effective to all users who are assigned to that role.
Notes:
- Selected components are displayed in green.
- An application with a component that is not selected is displayed in green italics. For example, if a component under Test Scores is not selected, then Test Scores is displayed in italics denoting that not everything under Test Scores has been granted permission.
- For those components with a read-only capability and read-only is selected, the component is displayed in orange. Read-only access limits the user to only be able to view data on a page. The component must be selected along with the read-only option.
- For Budget and Finance, an All Historical File IDs read-only option is available allowing users to view all file IDs when logged on to the application if the option is selected. If the option is not selected, the user can only view the current year.
❏ Click Save.
Delete a role:
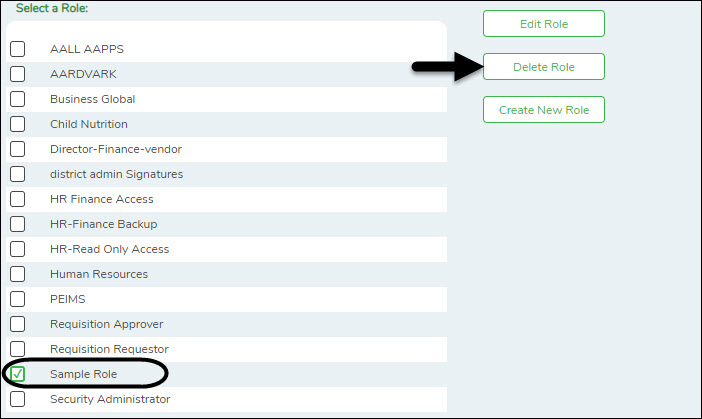
❏ From the Manage Roles page, you can type a role name in the Search Roles field. As you type the role name, the existing roles that match the typed data are displayed under Select a Role. The Edit Role and Delete Role buttons are enabled.
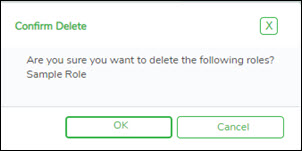
❏ Click Delete Role to delete a role. A pop-up window prompts you to confirm that you want to delete the role.
- Click OK to delete the role.
- Click Cancel to not delete the role.
