User Tools
Sidebar
Add this page to your book
Remove this page from your book
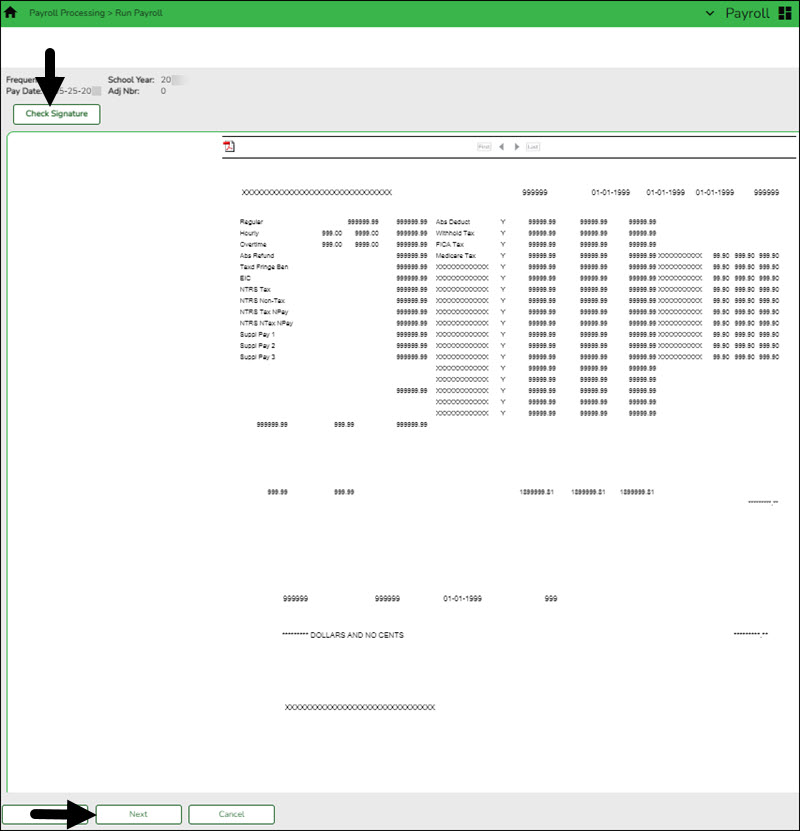
❏ Click Next to continue to the Payroll Check Test Pattern page. Otherwise, click Back to go back to the previous page or click Cancel to exit the run payroll process.
The Payroll Check Test Pattern page is used to preview and print the payroll checks. Use the scroll bars to view and verify the alignment of the check. If the local education agency (LEA) is using electronic signatures for checks, click Check Signatures.
❏ Click Next to continue. Otherwise, click Back to go back to the previous page or click Cancel to exit the run payroll process. If you click Next, the actual payroll checks are displayed. Only one check is displayed at a time.
Note: Be sure to verify printer settings.
❏ Choose from the following options:
- Click Previous Check to view the last check again.
- Click Next Check to view the next payroll check.
- Click Print. The Printer Selection pop-up window opens.
- Under Page Range, select All or Pages. If Pages is selected, type the page range (e.g., 1-12) to print.
- Click Print. The pop-up window closes.
- Click Check Signature to open Check Signature pop-up window and to customize these options for individual checks.
❏ Click Next to continue. Otherwise, click Back to go back to the previous page or click Cancel to exit the run payroll process.
You printed checks 000100 -000120, and check numbers 000115 and 000117 did not print correctly. You cannot reprint only check numbers 000115 and 000117. Therefore, check numbers 000115-000120 must be reprinted. To assign new check numbers for checks 000115-000120, do the following:
- Select No in the Did the checks print correctly? field.
- Type 000115 in the Reprint checks starting from check number field, which indicates on which check the first printing error occurred.
- The Starting New Check Nbr field defaults to 000121, which is the next available check number.
- Click Next. The Print Checks pages opens for the user to view and reprint the original check numbers 000115-000120 as new checks 000121-000126.
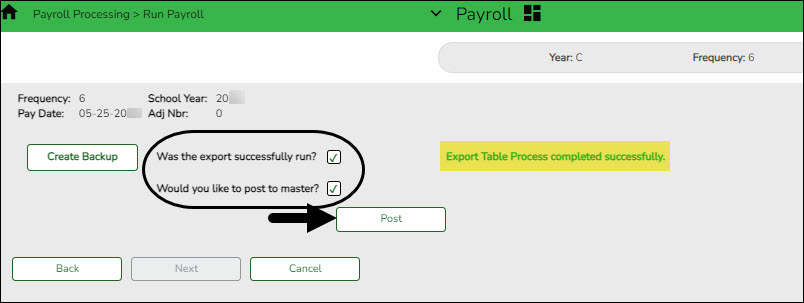
❏ Click Next to continue. Otherwise, click Back to go back to the previous page or click Cancel to exit the run payroll process. If you click Next, the create backup and post page is displayed.
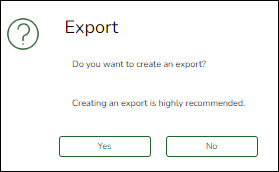
IMPORTANT: Do not skip this step. Click Create Backup. The export pay tables pop-up window opens allowing you to export the payroll tables.
- If you create an export when processing Regular or Supplemental payroll calculations, the data is exported to database tables, and the external .rsf file is no longer generated. As a result, the table names are no longer displayed during the export. Database tables can be imported using the Import HR Tables From Database Tables utility.
- If an export is run, it will overwrite the previous export database tables created for the pay frequency as only one set of payroll export database tables can exist per pay frequency.
- If you process payroll calculations for a check issue (adjustment cycle greater than zero), the external .rsf file is generated and the table names are displayed during the export.
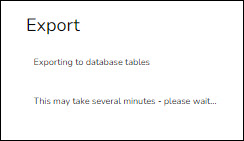
- Click Yes to create the export. A progress message is displayed.
- Click No to create the export.
A message is displayed if the export was successful.
| Was the export successfully run? | Select if the export was successful. |
|---|---|
| Would you like to post to master? | This field is enabled. Select to post to the master. The Post button is enabled. |
❏ Click Post! A message is displayed indicating that the posting was completed successfully. Click OK. The Post button is disabled and the Next button is enabled.
❏ Click Next to continue. If you click Next after running the payroll check process, print the Payroll Reports.
Under Payroll Reports:
❏ Select the Gen Rpt checkbox next to each report you want to generate or click Select ALL to select all reports. Review and print the reports as needed.
❏ On each report, under Sort Order, type the one-character letter that represents the sort option to be applied. Available sort options are listed under Sort Options. If the field is blank, no sort options are available.
❏ Click Generate Reports. The system displays the first report selected. Verify the report data is correct.
❏ Click Consolidate Rpts to combine the selected reports into one continuous report. This allows one PDF report to be created (instead of a PDF for each report).
❏ When all totals are verified, click Finish to close the Run Payroll page.
Americans with Disabilities Act (ADA) and Web Accessibility
The Texas Computer Cooperative (TCC) is committed to making its websites accessible to all users. It is TCC policy to ensure that new and updated content complies with Web Content Accessibility Guidelines (WCAG) 2.0 Level AA. We welcome comments and suggestions to improve the accessibility of our websites. If the format of any material on our website interferes with your ability to access the information, use this form to leave a comment about the accessibility of our website.


