User Tools
Sidebar
Add this page to your book
Remove this page from your book
ASCENDER Registration - Enroll, Re-Enroll or Pre-Enroll a Student
This guide covers the steps for enrolling a new student in the district using the ASCENDER Registration application, as well as re-enrolling a student who was previously enrolled in the district.
For information on registering a student who enrolled via ASCENDER ParentPortal online student enrollment, see the ASCENDER Registration - Register Students From ParentPortal Online Enrollment guide.
Prerequisites
❏ This guide assumes you are familiar with the basic features of the ASCENDER Student system and have reviewed the ASCENDER Student Overview guide.
❏ You must be a registered ASCENDER user and have rights to access the campus on which you are registering the student.
❏ For more detailed information about individual fields, see online Help in the ASCENDER Student system.
Checklist Overview
The following steps are covered in this guide:
❏ Enroll a student who has never been enrolled in the district:
- Create a student record.
- Add a student demographic data.
❏ Re-enroll a student from an historical record.
❏ Enroll the student in special programs.
Enroll a New Student
The following steps describe adding a student who has never had a record in the district.
Registration > Maintenance > Student Enrollment
❏ Leave Student and Texas Unique Stu ID blank, and click Retrieve.
Depending on the setting of the Auto Assign Student I field on Registration > Maintenance > District Profile > District Maintenance > Control Info, the following occurs:
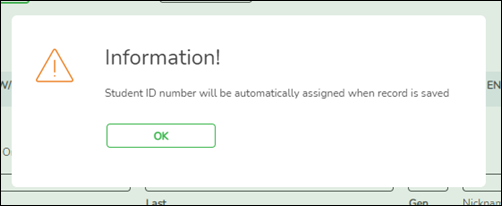
• If Auto Assign Student ID is selected, the next state ID is automatically assigned to students. The following pop-up message is displayed:
Click OK.
• If Auto Assign Student ID is not selected, you must enter an ID number for the student. The following message is displayed at the bottom of the page:
- In the Student field, type an unused six-digit student ID.
- Click Retrieve.
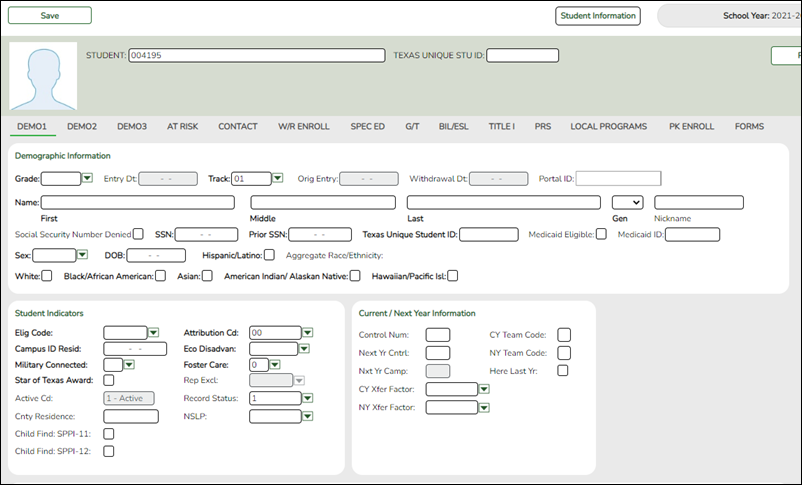
❏ The Demo1 tab opens with blank fields allowing you to enter the student’s full name and all required demographic data for the student.
Add Demographic Information
The Demo1 tab is one of three tabs where you can enter the student's demographic data.
Registration > Maintenance > Student Enrollment > Demo1
❏ The following fields are required to create a student record; however, the more complete the student’s record, the more useful the data is throughout the Student system.
• Grade
• Entry Dt
• First and Last Name
• Elig Code
• Either SSN or Social Security Num Denied
• Sex
• Date of Birth
• At least one race must be selected.
Other bolded fields are required for PEIMS reporting and should be entered.
See online Help for descriptions of each field.
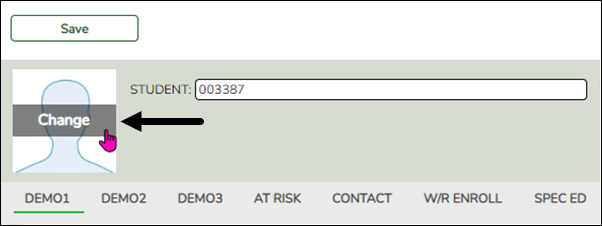
❏ If a photo exists for the student ID, the student photo is displayed. You can add or change the student photo:
• Hover over the image and click Change.
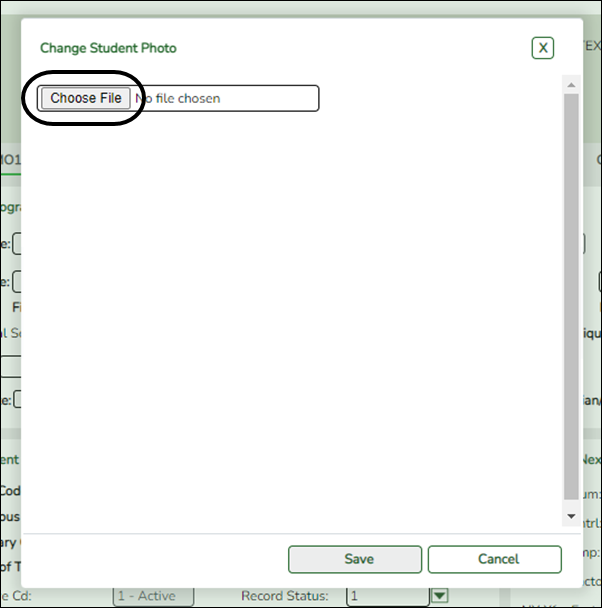
The Change Student Photo window opens.
• Click Choose File. Locate and open the file for the new image.
• Click Save to close the window.
❏ Click Save.
When enrolling a new student, you must save the information on the Demo1 tab before continuing. You are not allowed to proceed to any other tabs until the information is saved.
Note: Once data is saved on the Demo1 tab, it is not necessary to click Save on each tab. You can make changes on multiple tabs and then click Save once.
Registration > Maintenance > Student Enrollment > W/R Enroll
Once the record is saved on the Demo1 tab, the student will have an enrollment record on the W/R Enroll tab.
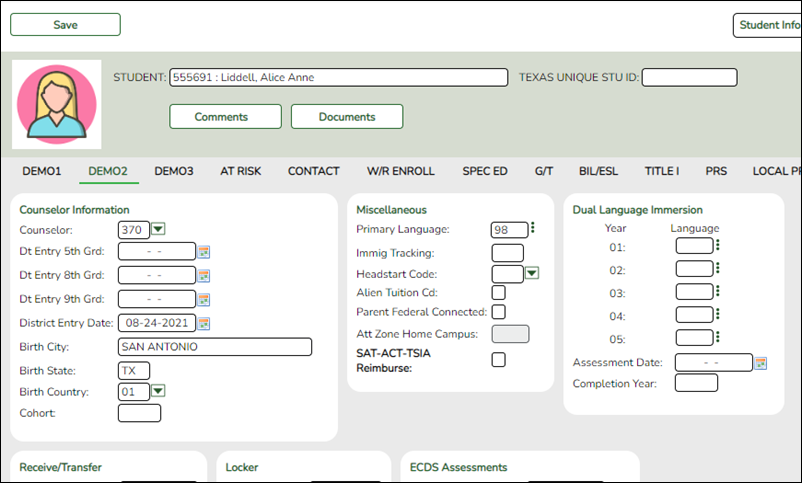
Registration > Maintenance > Student Enrollment > Demo2
Enter additional data for the student, including counselor, receiving/transfer, locker, and miscellaneous information. Several local use field are available on this tab.
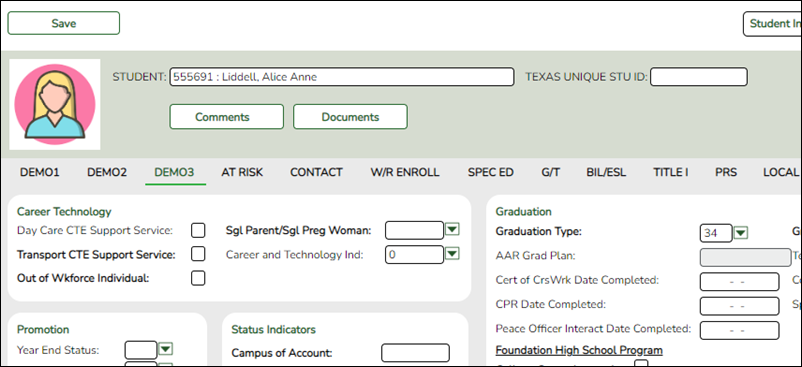
Registration > Maintenance > Student Enrollment > Demo3
Enter additional data for the student, including CTE data, status indicators, and any available promotion or graduation data.
❏ Click Save.
Re-enroll a Student from Historical
The Historical Directory allows you to search for students who were enrolled in the district in a prior school year and select a student for re-enrollment.
Registration > Maintenance > Student Enrollment
❏ To locate a student, leave Student and Texas Unique Stu ID blank, and click Hist Directory.
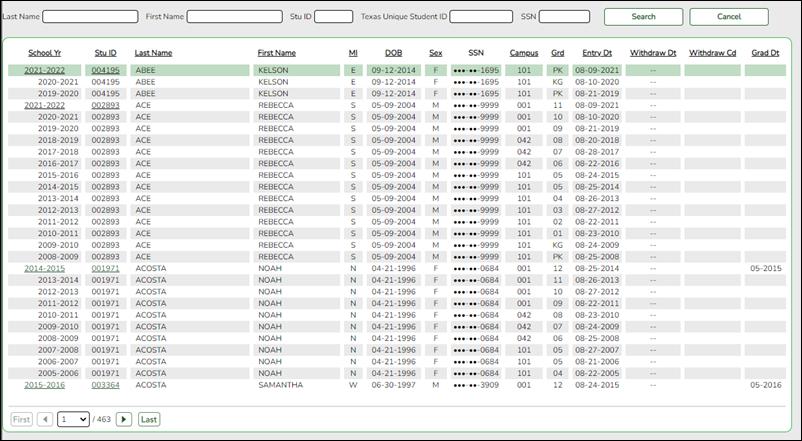
The Historical Directory opens.
❏ Enter data in one or more of the following fields, or leave all fields blank.
- Last Name - Type all or part of the student’s last name to retrieve students whose last name begins with the letters you have typed.
- First Name - Type all or part of the student’s first name to retrieve students whose first name begins with the letters you have typed.
- Stu ID - Type all or part of the student’s ID to retrieve students whose ID begins with the characters you typed.
- Texas Unique Stu ID - Type all or part of the student’s Texas Unique Student ID to retrieve students whose ID begins with the characters you typed.
- SSN - Type all or part of the student’s social security number to retrieve students whose SSN begins with the characters you typed.
All except the SSN field are autosuggestion fields. As you begin typing, a drop-down list displays students whose data begins with the numbers or characters you have typed. From the drop-down list you can select the student.
❏ Click Search.
The students who meet the criteria entered are displayed. The records are sorted ascending by last name and first name, and then descending by year.
• If more students are retrieved than can be displayed on one page, you can page through the list.
• The list can be re-sorted by clicking an underlined column heading.
The list includes enrollment records from the current year and previous years.
• A blue link indicates a student who is not currently enrolled and can be re- enrolled.
• A black link indicates a student who is currently enrolled; these students cannot be re-enrolled.
• You can only click a row for the most recent year the student was enrolled; records for earlier school years are not hyperlinked.
❏ When you locate the student you want to re-enroll, click the blue link for either the student ID or school year.
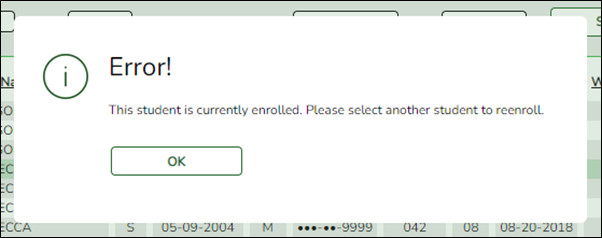
• If the student’s latest enrollment is in the current school year (i.e., if you clicked a black link), a message indicates that the student is currently enrolled.
Click OK.
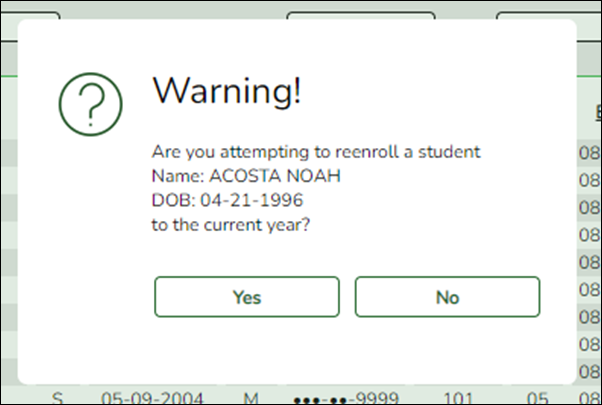
• If the student was last enrolled in a previous school year, a warning message prompts you to confirm that you want to re-enroll the student in the current year.
Click Yes.
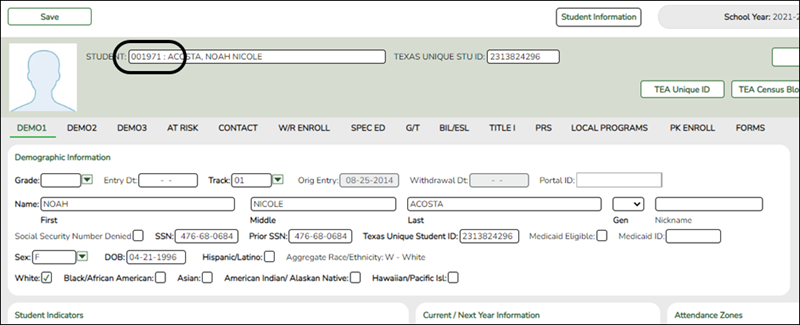
The Dem1 tab opens allowing you to re-enroll that student. The student ID (as displayed in the Student field must be the same as used previously.
- You must enter the Grade and Entry Dt fields for the student.
- Add or update additional data for the student.
- Click Save.
Enroll a Student in Special Programs
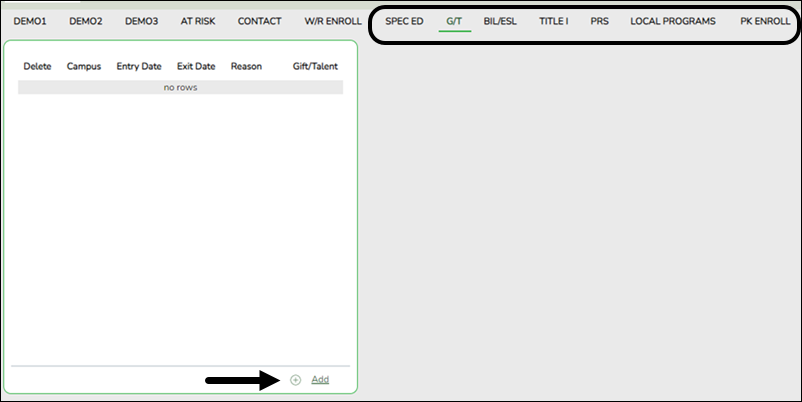
Additional tabs on the Student Enrollment page allow you to enroll the student in various special programs, including special education, gifted and talented, bilingual/ESL, Title I, pregnancy-related services (PRS), local programs, and PK enrollment.
- If the student is new to the district, there will be no existing rows on the program tabs.
- If a student was previously enrolled in the district and in a special program, one or more rows will be displayed with previous enrollment data. The most recent row must contain an exit date and withdrawal reason code in order to add a new record.
Registration > Maintenance > Student Enrollment
For example, to enroll a student in the Gifted and Talented Program:
❏ From the G/T tab, click +Add to add a record. A blank row is added to the grid.
❏ Type the date the student entered the program in the MMDDYYYY format.
❏ Additional fields may be needed depending on the program. See online Help for descriptions of the fields.
❏ ClickSave.
Pre-Enroll Student
The following steps describe adding a student who has never had a record in the district.
Registration > Maintenance > Student Enrollment
❏ Leave Student and Texas Unique Stu ID blank, and click Retrieve.
Depending on the setting of the Auto Assign Student I field on Registration > Maintenance > District Profile > District Maintenance > Control Info, the following occurs:
• If Auto Assign Student ID is selected, the next state ID is automatically assigned to students. The following pop-up message is displayed:
Click OK.
• If Auto Assign Student ID is not selected, you must enter an ID number for the student. The following message is displayed at the top of the page:
- In the Student field, type an unused six-digit student ID.
- Click Retrieve.
❏ The Demo1 tab opens with blank fields allowing you to enter the student’s full name and all required demographic data for the student.
Add Demographic Information
The Demo1 tab is one of three tabs where you can enter the student's demographic data.
Registration > Maintenance > Student Enrollment > Demo1
❏ The following fields are required to create a student record; however, the more complete the student’s record, the more useful the data is throughout the Student system.
• Grade
• Entry Dt
• First and Last Name
• Elig Code
• Either SSN or Social Security Num Denied
• Sex
• Date of Birth
• At least one race must be selected.
Other bolded fields are required for PEIMS reporting and should be entered.
See online Help for descriptions of each field.
Americans with Disabilities Act (ADA) and Web Accessibility
The Texas Computer Cooperative (TCC) is committed to making its websites accessible to all users. It is TCC policy to ensure that new and updated content complies with Web Content Accessibility Guidelines (WCAG) 2.0 Level AA. We welcome comments and suggestions to improve the accessibility of our websites. If the format of any material on our website interferes with your ability to access the information, use this form to leave a comment about the accessibility of our website.


