Sidebar
Add this page to your book
Remove this page from your book
Manage Assignments
Settings > Manage Assignments
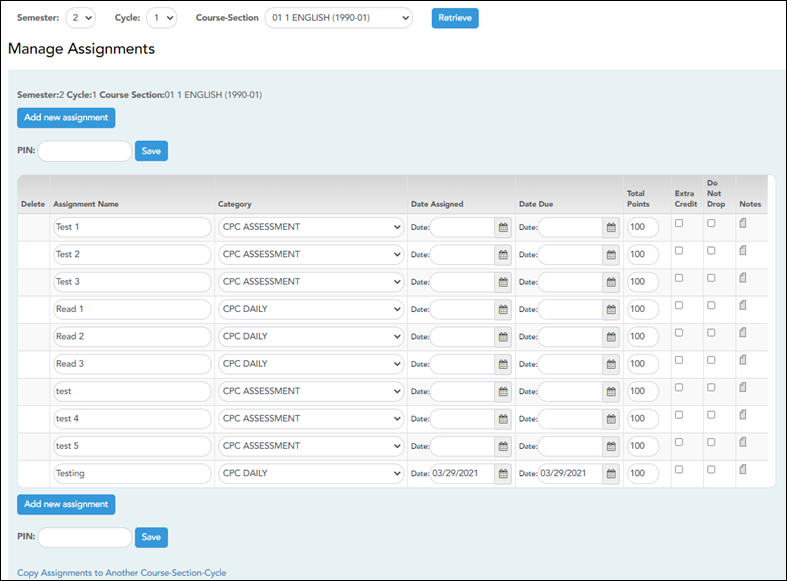
This page allows you to add assignments for your active courses, including extra credit assignments. You can also copy the assignments to other courses.
Categories must be established for the course on Settings > Manage Categories before you can add assignments.
Different fields are displayed according to the type of course selected (category-based (i.e., regular) courses and standards-based courses).
You cannot make changes to assignments once the cycle is closed.
Update data:
❏ Specify the course-section:
| Semester | The current semester is displayed by default. You can select another semester. |
|---|---|
| Cycle | The current cycle is displayed by default. You can select another cycle. |
| Course-Section |
Select the course-section you want to add assignments for. The drop down lists the two-digit period and course name. The course number and section number are in parentheses.
NOTE: For courses that are part of a course group, any changes to an assignment will apply to all courses in the group. An assignment can only be modified or deleted if no grades exist for the assignment for any course in the group. |
❏ Click Retrieve.
Assignments that have previously been entered for the semester-cycle-course-section are listed. Otherwise, the message “No Assignment Exists” is displayed.
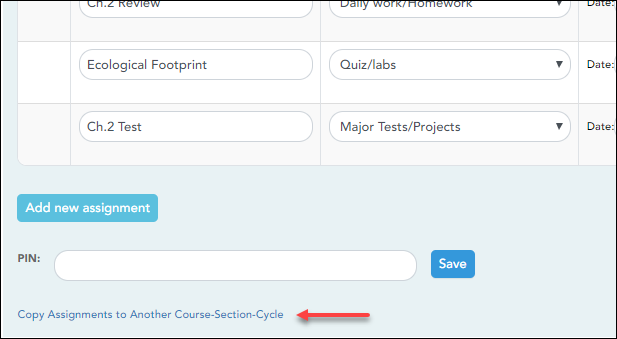
❏ Click Add new assignment to add a new assignment.
A blank row is added to the grid.
| Assignment Name |
Type a name for the assignment (e.g., Pop Quiz 1), up to 50 characters, that is unique no matter what the category is per semester/cycle. Assignment names can be changed at any time, as needed.
TIP: It is helpful to keep the assignment name as brief as possible; however, the name should be descriptive enough to distinguish it from other assignments. Longer assignment names require more space on the Assignment Grades page, which may result in a more cumbersome page.
|
||||||
|---|---|---|---|---|---|---|---|
| Category |
Select a category for the assignment. These categories are established on Settings > Manage Categories. |
||||||
| Edit Standards/Skills |
For standards-based courses, the number of standards currently associated for the assignment is displayed.
|
||||||
| Date Assigned |
Type the assignment date in the MMDDYYYY format, or click NOTE: This field is critical for running the Graded Assignment Count admin report. If this field is blank for an assignment, and a date range is selected when running the report, the assignment is not included in the report. |
||||||
| Date Due |
Type the assignment date in the MMDDYYYY format, or click NOTE: You can also set a default value for this field using the in the Default Assignment Due Date field on Settings > Update Profile. Valid options are no default date, the current date, or up to five days in the future. You can override the default date as needed. |
||||||
| Total Points |
Type the total number of possible points for the assignment. Do not type zero unless it is an extra credit assignment. The field is set to 100 by default. NOTE: If you have assigned a rubric chart to this assignment, this field displays the total possible points for the rubric chart and cannot be updated.
If you are using percentage-based weighting, and if the field is not set to 100, the warning icon WARNING: If all assignments in a category do not have the same total points value, then the calculations for dropping a specified number of assignments for the category (as indicated in the # Drop field on Settings > Manage Categories) may result in an average that is different than expected. If the total points value varies, the grade with the lowest number of points may not necessarily be the lowest grade. |
||||||
| Extra Credit |
Select if the assignment is for extra credit. NOTE: If the assignment is for extra credit, the Total Points is set to zero and cannot be changed.
|
||||||
| Do Not Drop |
Select if you do not want to drop that particular assignment. This field relates to the # Drop field on Settings > Manage Categories. |
||||||
| Rubric |
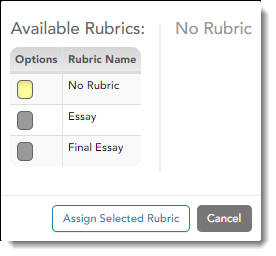
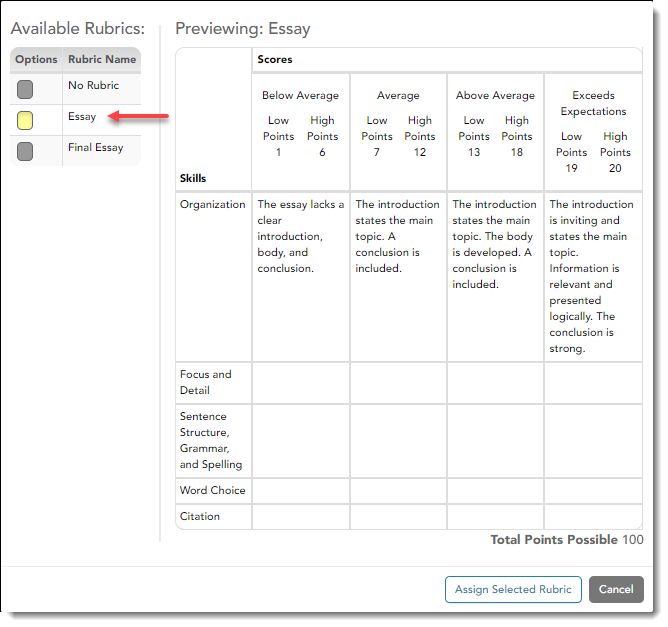
You can assign an existing rubric chart to the assignment, which allows you to grade the assignment using a rubric chart. The rubric charts are created on Settings > Rubric Setup.
• If a rubric chart is not currently associated with the assignment, the
The rubric chart window opens.
The window closes.
IMPORTANT: The Total Points field for the assignment changes to display the maximum possible points for the rubric chart (maximum possible points x skill count) and is read-only. |
||||||
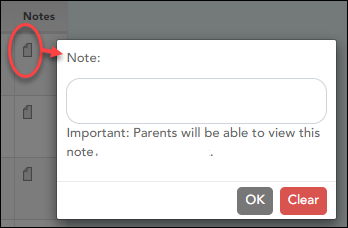
| Notes |
❏ Click
|
||||||
 |
Click to delete an assignment.
NOTE: You cannot delete an assignment if grades have been posted for the assignment. |
Save assignments:
| PIN | Type your four-digit personal identification number (PIN). |
|---|
❏ Click Save.
Copy assignments to another course-section:
Once you have saved assignments for a course, you can copy the assignments to another course-section.
❏ Use the Semester, Cycle, and Course-Section fields to select the course-section from which to copy assignments.
❏ Click Copy Assignments to Another Course-Section-Cycle.
The Copy Assignments page opens.
Americans with Disabilities Act (ADA) and Web Accessibility
The Texas Computer Cooperative (TCC) is committed to making its websites accessible to all users. It is TCC policy to ensure that new and updated content complies with Web Content Accessibility Guidelines (WCAG) 2.0 Level AA. We welcome comments and suggestions to improve the accessibility of our websites. If the format of any material on our website interferes with your ability to access the information, use this form to leave a comment about the accessibility of our website.

