User Tools
Sidebar
Add this page to your book
Remove this page from your book
By Date/Course (Attendance Posting)
Attendance > Maintenance > Student > Student Posting > By Date/Course
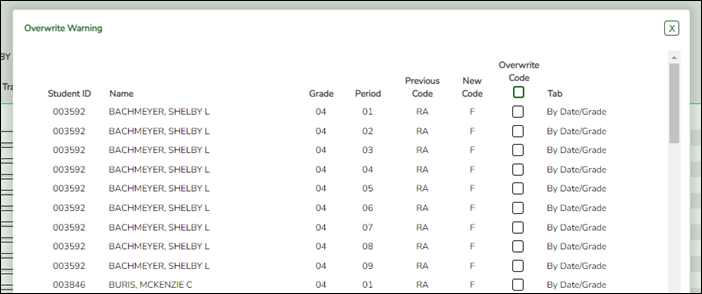
This tab allows you to post attendance for a group of students in the same course-section. All students must have the same absence date, instructor, course, section, semester, and track. You can select a different posting code for each student, and/or overwrite existing posted attendance (an Overwrite Warning pop-up window will be displayed).
Attendance can only be posted for the current school year, and only for tracks that have a calendar set up for the campus.
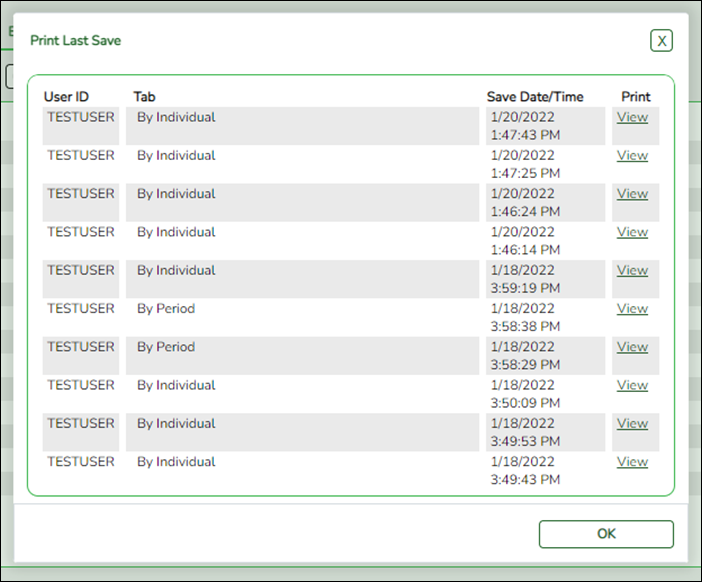
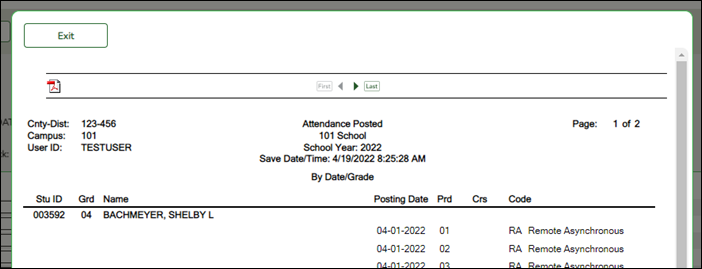
NOTE: If you post or change a posting code, your user ID and the date-time stamp are saved in the attendance posting table, and an audit record is created in an audit table.
Update data:
| Date | The current date is selected by default.
Click in the field to select a valid absence date from the calendar. Or, type the date in the MMDDYYYY format. This is the date on which the student will be posted absent or tardy. |
|---|---|
| Instructor |
Type or click |
| Course |
Select the course for which to post attendance. |
| Section |
Select the section for which to post attendance. |
| Semester |
Select the semester in which the course-section is taught. |
| Track |
Select the attendance track. Only tracks established for the campus in the Attendance application are listed. |
❏ Click Retrieve.
A list of students enrolled in the course-section is displayed. The student's grade level and period are also displayed.
If the student is enrolled in the course-section during multiple periods, the student list listed multiple times.
If you change the Date, Instructor, Course, Section, or Semester and click Retrieve, the page is re-displayed according to your selections. It is not necessary to click Retrieve if you only change Track.
- You can re-sort the grid by clicking an underlined column heading.
Clicking an underlined column heading will sort the grid in ascending order by that column. Click it again to sort in descending order.
A green arrow next to the column heading indicates the column by which the grid is currently sorted and whether it is sorted in ascending or descending order.
- If there are multiple pages, page through the list.
. - Changes are not retained across pages; you must save changes on each page.
If a course is scheduled for more than one period, the range of periods is displayed, and the absence is posted for all periods in the range. In this case, the posting code and comments are not displayed.
| Code |
For each student who was absent or tardy, type or click Leave blank if the student was on time and present for the entire class. |
|---|---|
 |
Click to view the student's class schedule for the semester of the specified date. The schedule opens in a pop-up window. |
| Comments by Period | Click to enter attendance comments for the student. Comments can only be entered if a posting code is entered. You can only enter comments for the period of the selected course-section. A pop-up window opens allowing you to view, add, and update comments. |
❏ Click Save to post attendance.
- You can make changes on multiple tabs to different students and save all changes at once.
- If there are multiple pages of students retrieved, you must save each page individually.
If attendance was previously posted for the same student, date, and period, a pop-up window opens when you save prompting to confirm that you want to overwrite the previous data:

The grid displays the previously posted code and the new code for each period, as well as the tab on which the new code was posted, for the date specified on the main page.
| Overwrite Code |
For each row, indicate if you want to overwrite the existing posting code for the student, date, and selected period(s). If there are multiple rows, you can select the check box in the heading to overwrite the code for all rows. |
|---|
Click OK. The changes are saved.
Americans with Disabilities Act (ADA) and Web Accessibility
The Texas Computer Cooperative (TCC) is committed to making its websites accessible to all users. It is TCC policy to ensure that new and updated content complies with Web Content Accessibility Guidelines (WCAG) 2.0 Level AA. We welcome comments and suggestions to improve the accessibility of our websites. If the format of any material on our website interferes with your ability to access the information, use this form to leave a comment about the accessibility of our website.


The icon is yellow if comments currently exist for the student, date, and any of the selected periods. The icon is white if the student has no comments on that date.
Only one period is listed. Select the period to apply the comment to the period.
The icon is yellow if comments exist. Otherwise the comment icon is white.
 to indicate that it is the active comment.
Click the icon to add, update, or view existing comments for a particular period.
When you click the icon, it is outlined with a black box
The space on the right is enabled allowing you to type a comment.
The space on the right is where you add or update comments for the student, up to 255 characters. The space is not enabled until at least one period is selected, or until you click a View Comment icon.
WARNINGS:
Comments are not saved until you click Save.
If you enter comments, click Apply Checked, receive an Overwrite Warning message and click OK, and then click the “X” to close the window, the new comment does not overwrite the original comment until you click Save and the Saved Successful message is displayed.
If you entered comments for a posting code, and then clear the posting code, the comment is cleared without notification.
A student's comments can be viewed on Attendance > Maintenance > Student > Student Inquiry > Attendance Audit.