Student Enrollment
Registration > Maintenance > Student Enrollment
You must select a student before you can access the tabs on the Student Enrollment page.
❏ To retrieve a student's records, select the student in one of the following ways:
| Student |
Begin typing the student ID (with leading zeros) or last name. As you begin typing, a drop-down list displays students whose ID or last name begins with the numbers or characters you have typed. The drop-down list displays the students' full name and grade level. From the drop-down list you can select the student. |
|---|---|
| Texas Unique Stu ID |
Type all or part of the student's Texas Unique Student ID to retrieve students whose ID begins with the characters you typed.
Review the Assign a TSDS Unique ID guide for additional information. |
| Directory | Click to select a student from the Directory. |
| (photo) |
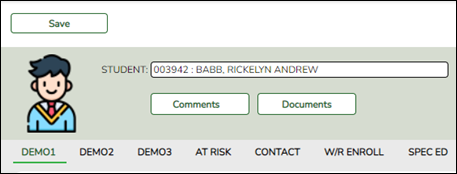
If a photo exists for the student, the student photo is displayed. Photos are not displayed in all applications. They are displayed in Attendance (Inquiry), Discipline, Grade Reporting, Graduation Plan, Health, Registration, and Scheduling. They are not displayed in Special Ed or Test Scores. |
ASCENDER Registration - Assign a TSDS Unique ID
The purpose of this document is to guide you through the process of assigning a Unique ID using the TSDS Unique ID button in Registration. This functionality works in conjunction with the Texas Student Data System (TSDS). TSDS uses web services for Unique ID and for the Data Transmission Utility (DTU) allowing ASCENDER to interact directly with their Unique ID application to assign Unique IDs.
Prior to using the TSDS Unique ID button in ASCENDER, the LEA's designated TEAL user must obtain web service access. See Obtain Web Service Access in the Before You Begin section of this document.
This document assumes you are familiar with the basic features of the ASCENDER Student system and have reviewed the ASCENDER Student Overview guide.
IMPORTANT: Each LEA will have unique situations. Some of the dates, images, and examples provided in this document are for informational and instructional purposes only and may not completely represent your LEA's process.
Before You Begin
Review the following:
Terms:
| TSDS Unique ID/TX Unique Student ID/Unique ID | The unique number assigned to a student member by TEA’s Texas Student Data System (TSDS) Unique ID system. This ID is used for internal and state reporting purposes. |
|---|---|
| TEA | Texas Education Agency |
| TEAL | Texas Education Agency Login |
| SAM | Service Account Manager status in TEAL that provides one access to manage TSDS service accounts for the LEA. |
| Service Account | An account managed through TEAL allowing an LEA to use a specific web service. A service account must be set up by the Service Account Manager. The service account provides user name and password credentials that can be entered into a web application via an administrative interface to enable the application to use the web service. |
| Web Service | The web service references the specific TEA application to which the service account has access. For the purpose of this guide, the Application is Uniq-ID Web Services. |
Helpful Links:
Obtain Web Service Access
The TSDS Unique ID Web Services allows the transfer of information using an approved service account and valid credentials to authenticate access. These credentials are acquired by request using Texas Education Agency Login (TEAL). TEAL serves as the secure link between entities and provides access to various TEA web services such as Unique ID. This access must be requested by the individual at the LEA with TEAL access. This TEAL user must ensure the following steps are accomplished in order to create a web services account.
- Each LEA that will be using the Unique ID Web Service must designate at least one Service Account Manager (SAM), whose access must first be approved by the TEAL Approver.
- The designated Service Account Manager (SAM) is responsible for creating and managing service accounts, which are also approved by the TEAL Approver, for each web service used.
For detailed information about requesting Service Account Manager status and creating and managing service accounts in TEAL, reference the following documents:
After a Service Account Manager (SAM) is designated and approved, and has requested a new service account, identified the Unique ID Web Service will use the new service account, and received the web service user name and password from TEAL, the LEA can begin using the TSDS Unique ID button in ASCENDER to assign Texas Unique Student IDs.
Assign a TSDS Unique ID Process
Registration > Maintenance > Student Enrollment
Retrieve an existing student record or use the Student Enrollment Help page to create a new student record. A new student record must be saved prior to assigning a Unique ID. This allows the students's demographic information to be validated in the TSDS Unique ID application.
❏ Click TSDS Unique ID. The Texas Unique Student ID pop-up window is displayed.
- In the User ID and Password fields, type the user ID and password for the service account using the Unique ID Web Service. This is the user ID and password provided by TEAL.
- Click Search to submit the student's information through the TSDS Unique ID Web Service to verify whether or not the student has already been assigned a Unique ID. The following Demographic fields are required for a successful search:
- First Name
- Last Name
- Student ID/SSN (Nine-digit SSN)
- DOB (Date of Birth)
- Sex (Gender)
- Race (At least one)
- If the search returns a match or near match record in the Unique ID web service, the Match Probability column is displayed with a percentage indicating how closely the submitted record matches the existing record in the web service. This helps to determine if the record is for the same student.
NOTE: Per TSDS, records should not be considered matches if they are not higher than the Upper Near Match Threshold configured in the system.
- If the search returns no matches, the following message is displayed: “TX Unique Student ID cannot be found with provided credentials.” This indicates that the student has not been previously assigned a TX Unique ID.
- Click Assign New ID. If the record contains the necessary demographic information, the student's information is displayed and a Unique ID is either generated or if already existing, is displayed in the Tx Unique Student ID field.
- Student ID
- Tx Unique Student ID
- Last Name
- First Name
- SSN
- DOB
- Status - Displays the status of the student's Unique ID record from the Unique ID Web Service. This status varies based on the individual student's record. Review the list of possible TSDS Unique ID Status Messages.
If the student has multiple matching records, a list of records is displayed. Review the records and verify the student's details to determine the best match.
- After reviewing and verifying the data, select the radio button for the correct row. The Unique ID is populated in the Texas Unique Student ID field on the Demo1 tab. Click Assign New ID.
- Click X to close the Texas Unique Student ID pop-up window and return to the Demo1 tab.
- Click Cancel to cancel the process. The pop-up window is closed and the Unique ID is not populated on the Demo1 tab.
NOTE: If you click Cancel, the Unique ID that was generated for the student will remain assigned to that student in the Unique ID Web Services. This allows you to revisit the record at a later time and assign the Unique ID in ASCENDER.
❏ Click Save to assign and save the Texas Unique Student ID to the student's record in Registration.
The Student Enrollment page is enabled with Demo1 as the default tab.
To add a student who has never had a record in the district:
Leave Student and Texas Unique Stu ID blank, and click Retrieve.
Depending on the setting of Auto Assign Student ID on Maintenance > District Profile > District Maintenance > Control Info, the following occurs:
- If Auto Assign Student ID is selected, the next state ID is automatically assigned to students. A pop-up message is displayed indicating that the student ID number will automatically be assigned. Click OK.
- If Auto Assign Student ID is not selected, you must enter an ID number for the student. A message at the top of the page instructs you to enter the student ID.
- In the Student field, type an unused six-digit student ID.
- Click Retrieve.
The Demo1 tab opens with blank fields allowing you to enter the student’s full name and all required demographic data for the student.
The following fields are required to create a student record; however, the more complete the student’s record, the more useful the data is throughout the Student system.
- Grade
- Entry Dt
- First and Last Name
- Elig Code
- Either SSN or Social Security Num Denied
- Sex
- Date of Birth
- At least one race must be selected.
Other bolded fields are required for PEIMS reporting and should be entered.
Re-enroll a student from historical
To locate a student who was previously enrolled in the district, leave Student and Texas Unique Stu ID blank, and click Hist Directory.
The Historical Directory opens
Historical Directory
From all Registration > Maintenance > Student Enrollment tabs, you can click Hist Directory to open the Historical Directory, which is used to search students who were enrolled in a prior school year and select a student for re-enrollment.
Enter data in one or more of the following fields, or leave all fields blank.
| Last Name |
Type all or part of the student's last name to retrieve students whose last name begins with the letters you have typed. |
|---|---|
| First Name |
Type all or part of the student's first name to retrieve students whose first name begins with the letters you have typed. |
| Stu ID |
Type all or part of the student's ID to retrieve students whose ID begins with the characters you typed. |
| Texas Unique Stu ID |
Type all or part of the student's Texas Unique Student ID to retrieve students whose ID begins with the characters you typed.
Review the Assign a TSDS Unique ID guide for additional information. |
| SSN |
Type all or part of the student's social security number to retrieve students whose SSN begins with the characters you typed. |
All except the SSN field are autosuggestion fields. As you begin typing, a drop-down list displays students whose data begins with the numbers or characters you have typed. From the drop-down list you can select the student.
Click Search. The students who meet the criteria entered are displayed. The records are sorted ascending by last name and first name, and then descending by year.
- If there are multiple pages, page through the list.
- The list can be re-sorted.
You can re-sort the grid by clicking on an underlined column heading. It will sort in ascending order. Click it again to sort in descending order.
A triangle next to the column heading indicates the column by which the grid is currently sorted and whether it is sorted in ascending or descending
  order.
The list include enrollment records from the current year and previous years.
• A blue link indicates a student who is not currently enrolled and can be re-enrolled.
• A black link indicates a student who is currently enrolled; these students cannot be re-enrolled.
• You can only click a row for the most recent year the student was enrolled; records for earlier school years are not hyperlinked.
When you locate the student you want to re-enroll, click either the student ID or school year.
• If the student's latest enrollment is in the current school year, a message indicates that the student is currently enrolled. Click OK.
• If the student was last enrolled in a previous school year, a warning message prompts you to confirm that you want to re-enroll the student in the current year. Click Yes, and the Student Enrollment page opens allowing you re-enroll that student.
Click Cancel to return to the previous page without selecting a student.
If you have selected a student who can be re-enrolled, the Student Enrollment page opens allowing you re-enroll that student. The student ID (as displayed in the Student field) must be the same as used previously.
- You must enter the Grade and Entry Dt fields for the student.
- Add or update additional data for the student.
- Click Save.
Student Photo
Registration > Maintenance > Student Photo
If set up by the LEA, student photos are displayed on all maintenance pages on which individual student records are retrieved. The photo is displayed once you click Retrieve.
Use the students’ ID numbers to name each image file.
- The six digit code must match the student ID from ASCENDER (e.g., 081818.jpg or 123456.gif).
- The picture file extension formats that are supported are .jpg, .jpeg, .png, .bmp, or .gif.
- Aspect ratios of the images are preserved in ASCENDER.
- Files should be less than 1MB and preferably under 100K.
- You can upload individual student pictures on the Student Enrollment page of the Registration application.
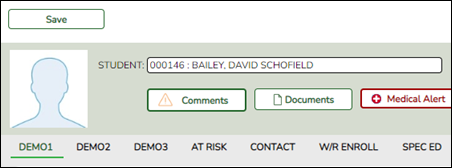
If a photo is not available, no image is displayed:
Change Student Photo
From the Registration > Maintenance > Student Enrollment page, you can upload a different photo for the student if an image file is available on your local PC.
Hover over the existing photo or silhouette, and the word “Change” appears on the image.
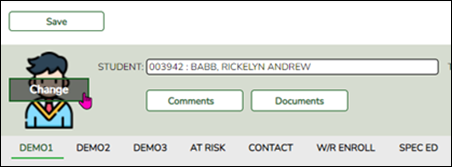
Click Change. The Change Student Photo window opens.
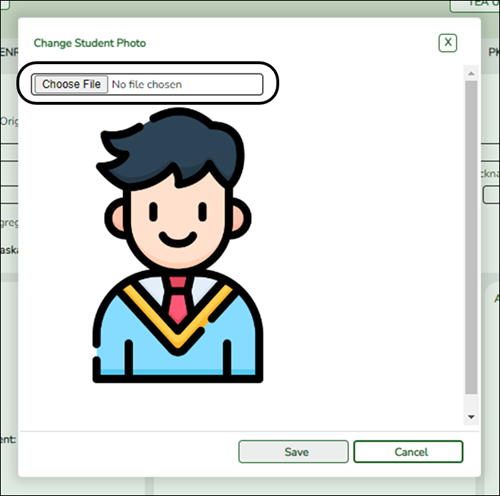
Click Choose File. Locate and select an alternate photo on your local PC. The new image is displayed.

Click Save. The new image now appears on the student maintenance pages.
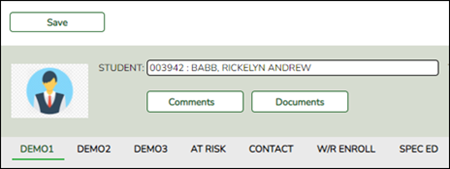
Photos are not displayed in all applications. They are displayed in Attendance (Student Inquiry), Discipline, Grade Reporting, Graduation Plan, Health, Registration, and Scheduling. They are not displayed in Special Education or Test Scores.
NOTE: The initial student photo image files must be copied to a folder in a ASCENDER directory. (Note that directory will vary by server.) Within the ASCENDER directory, place files in a Pictures folder, and in a district folder (e.g., ASCENDER Directory\Pictures\cccddd\NNNNNN.jpg, where NNNNNN is the student's 6-digit student ID). If a Pictures folder does not exist, or if the district folder does not exist, photos will not be enabled on any pages. The ASCENDER Getting Started Guide (available with ASCENDER technical documents) provides additional information.


