User Tools
Sidebar
Add this page to your book
Remove this page from your book
Asset Management Annual Process
The purpose of this document is to guide you through the process of managing asset records and performing end-of-year procedures for Asset Management.
This document assumes you are familiar with the basic features of the ASCENDER Business system and have reviewed the ASCENDER Business Overview guide.
Some of the images and/or examples provided in this document are for informational purposes only and may not completely represent your LEA’s process.
Asset Management Summary Quick Checklist (prints separately) - This is a one-page quick checklist of the following steps.
Asset Record Maintenance (performed throughout the year)
Finance
- Verify object/sub-object codes.
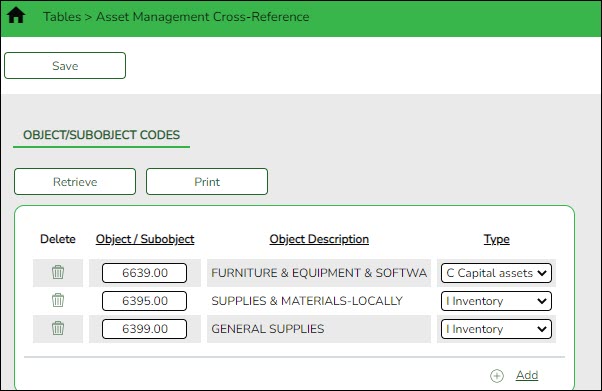
Verify object/subobject codes
Finance > Tables > Asset Management Cross-Reference > Object/Subobject Codes
Verify that object/subobject codes for any assets that need to be carried over exist in the Asset Management Cross-Reference table.
If you need to add object/subobject codes to the table, the codes must exist in the Chart of Accounts.
- Extract data to Asset Management.
Extract data to Asset Management
Finance > Utilities > Extract to Asset Management
Run the Extract to Asset Management utility to extract data from Finance to Asset Management.
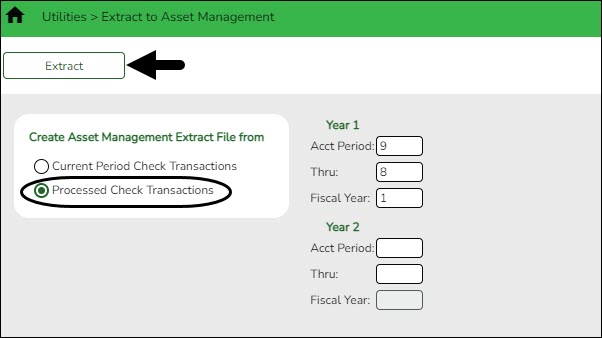
❏ Under Create Asset Management Extract File from, select Processed Check Transactions to enable the Year fields and complete the Acct Period, Thru, and Fiscal Year fields for the accounting periods you want to capture.
TIP: The value in the Thru field should be the month where you last posted check transactions.
Notes:
- The Use Asset Management Cross-Reference Table option on the District Finance Options page must be selected before assets/inventory transactions can be extracted.
- The Asset Management Cross-Reference table must have object/subobject codes for all assets/inventory before assets/inventory transactions can be extracted.
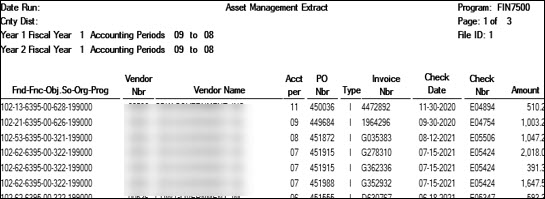
❏ Click Extract. The Asset Management Extract report is displayed. Be sure to save or print the report.
❏ Click Process to begin creating the file. A message is displayed indicating that the process was successful. Click OK.
A dialog box is displayed with the file name (e.g., FINFA_02212022.txt) prompting you to save the file. Be sure to make note of the file name as you will need to access it during the import process.
❏ Click Cancel to return to the Extract Asset Management page.
Asset Management
CAUTION: Prior to initiating end-of-year procedures, use the Asset Management > Utilities > Export by File ID page to perform an export of all current year data. Do not proceed until a valid export of all current year data exists.
If at any point during the export process, you need to restart, be sure to log out and back into Finance; otherwise, you may receive an error when trying to export data.
- (Optional) Verify automatic numbering.
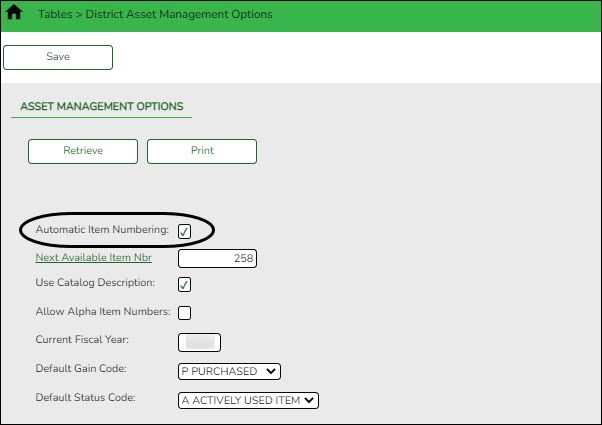
(Optional) Verify automatic numbering
Asset Management > Tables > District Asset Management Options
If you want ASCENDER to maintain and auto-assign the next available Inventory Item numbers when adding or importing new items, select Automatic Item Numbering.
- Import/add asset items from Finance.
Import/add asset items from Finance
Asset Management > Maintenance > Inventory Maintenance > Transaction Records
Use the file that you previously created in Finance on the Extract to Asset Management page to import asset items. Or, manually add asset items as needed.
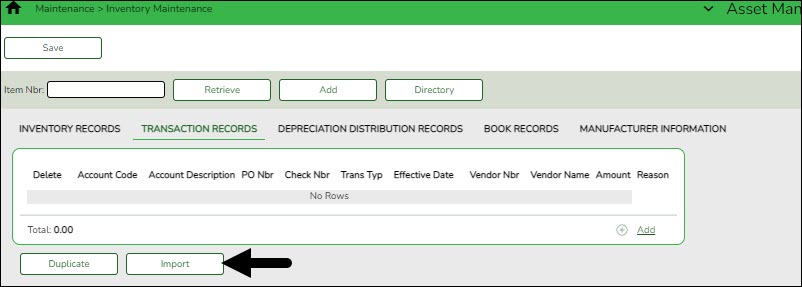
❏ Click Import to begin the import process.
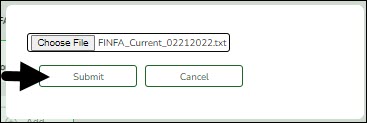
- Click Choose File to select the file that you created from Finance.
- Click Submit to import the selected file. A list of assets that can be moved from Finance is displayed.
- Select the asset to extract from Finance.
- Enter the Date Acquired to Save As and click OK. The item is now displayed on the Transaction Records tab.
❏ Click Save to save the item. Repeat this process to continue importing the additional asset items as only one record can be imported at a time.For each “C” item record that is $5,000 and over, you must complete the required fields on the Inventory Records, Depreciation Distribution Records, and Book Record tabs. You can either import all items and then return to each record and complete the fields on the various tabs OR complete the fields on the various tabs as you are importing each record. Either way, be sure to click Save after entering all data for a record to ensure that the record is updated.
❏ If you have any inventory records that were not imported, you can manually enter those items so that you will have a complete inventory for closing the year. Reference the Enter Records in Asset Management guide for additional information.
- All C - Capital Assets must have a Transaction, Inventory, Depr Distribution, and Book Record entered.
- All I - Inventory Assets must have the Transaction and Inventory tabs completed only.
- (Optional) Generate the Campus Room Inventory Report.
(Optional) Generate the Campus Room Inventory Report
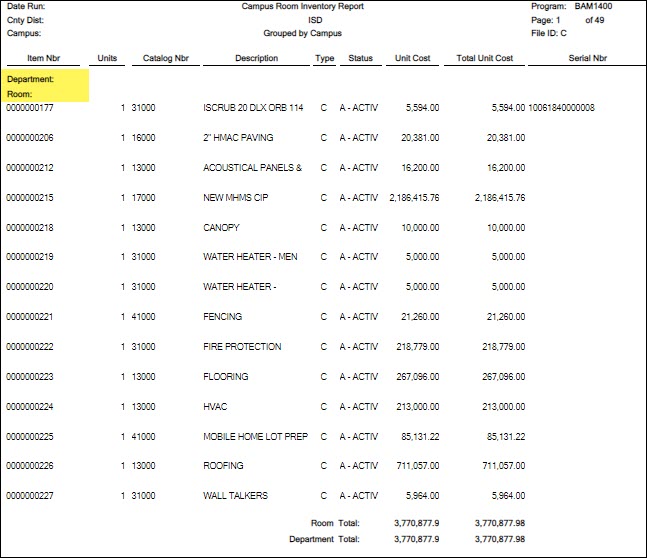
Asset Management > Reports > Asset Management Reports > BAM1400 - Campus Room Inventory Listing
Generate and distribute the Campus Room Inventory Reports to staff so that they can verify the location and account for the various items.
It is best practice to generate the report in May prior to the end of the school year. Employees can make changes in red ink, sign the report, and then return it to the appropriate department/person allowing them to make the necessary changes in Asset Management. Possible changes may include items moving locations or being sold, broken, or deleted.
- Update asset items.
Update asset items
Asset Management > Maintenance > Inventory Maintenance > Inventory Records
Review the Campus Room Inventory Report to identify and make the necessary changes to asset item records. - Mass update last inventory dates.
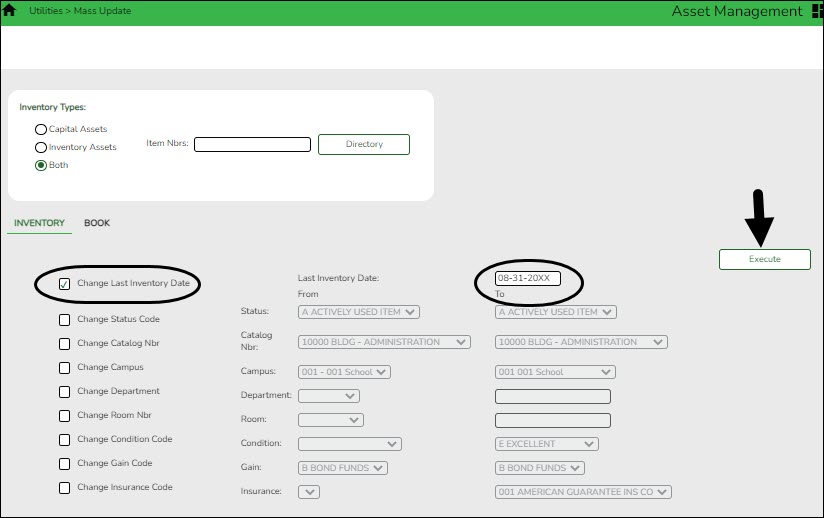
Mass update last inventory dates
Asset Management > Reports > Asset Management Reports > BAM1400 - Campus Room Inventory Listing
After the annual inventory has been completed and any changes to items recorded, perform a Mass Update to update the Last Inventory Date on the Inventory Records tab.

Depreciation Calculations and EOY Reports
Asset Management
- Generate the Status Report.
Generate the Status Report
Asset Management > Reports > Asset Management Reports > BAM1050 - Status Report
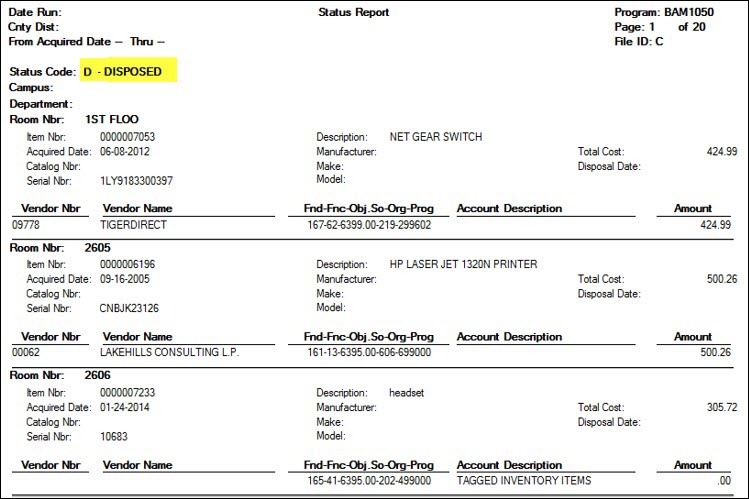
Generate the report to review any asset items that were sold, deleted, or entered in error. All items entered in error, for sale, or to be deleted must have a status code change on the Asset Management > Maintenance > Inventory Maintenance > Inventory Records tab to reflect their status.
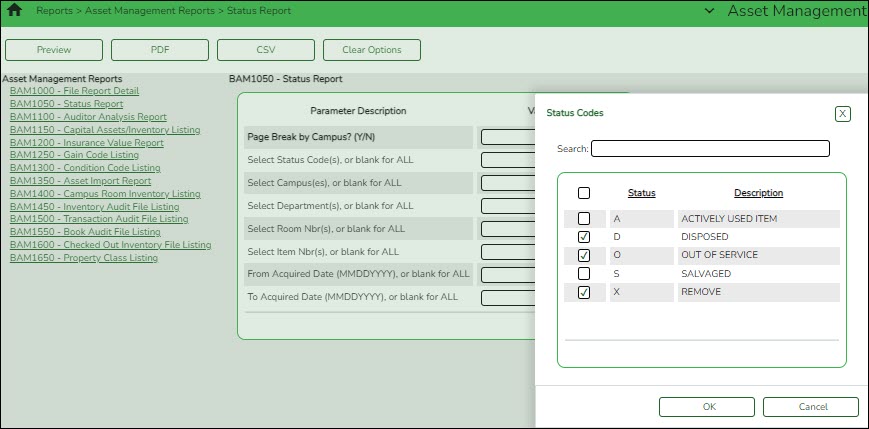
Use the status codes created for your LEA that reflect an action to remove the item from the inventory when the EOY process is performed.
Auditors want to see this report. Print and save the report.
- Enter sale information for capital assets.
Enter sale information for capital assets
Asset Management > Maintenance > Inventory Maintenance > Inventory Records
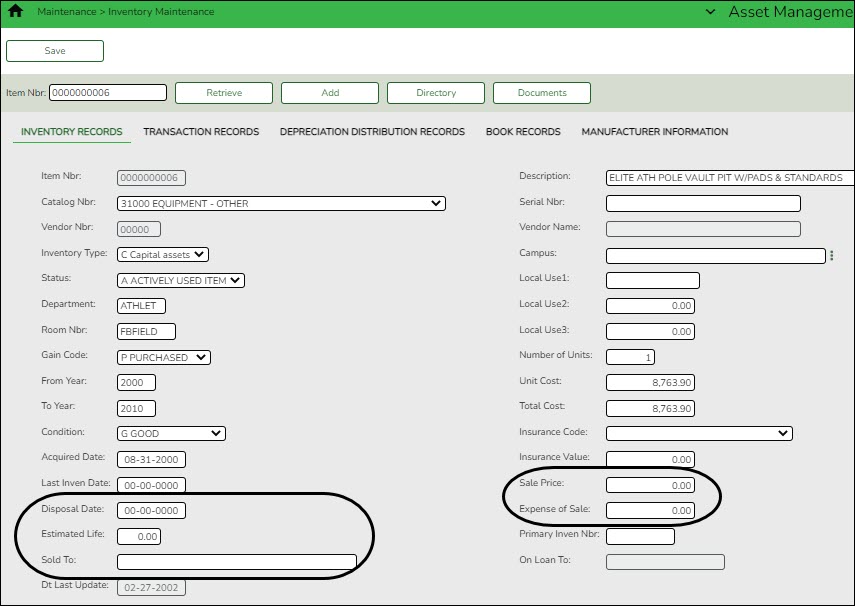
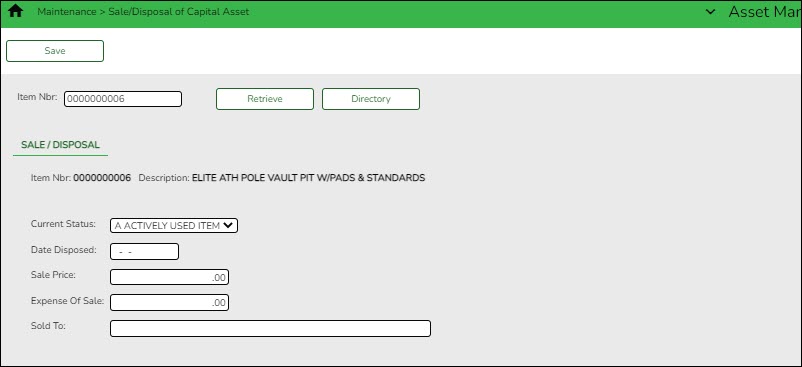
Verify that the required information is entered for the sale of any capital assets. The Sale Price, Date, and Sold To information is required for the sale of “C” items. You can enter this information on the Inventory Records tab OR on the Asset Management > Maintenance > Sale/Disposal of Capital Asset page.
- Generate the Capital Assets/Inventory Listing, Auditor Analysis, and Property Class Listing Reports.
Generate the Capital Assets/Inventory Listing, Auditor Analysis, and Property Class Listing Reports
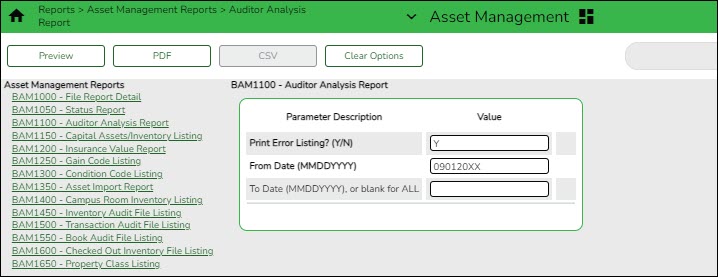
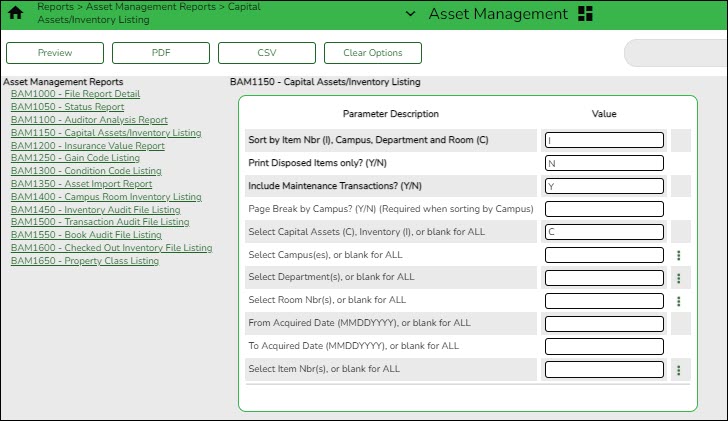
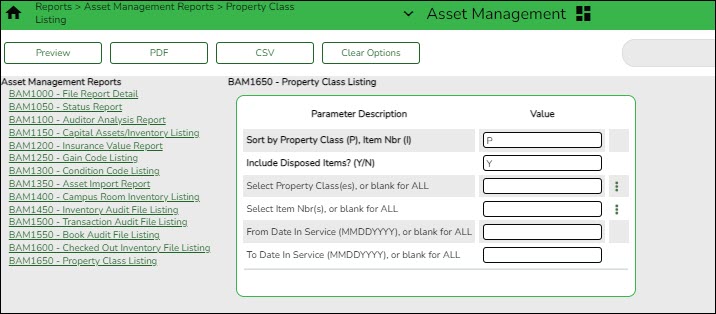
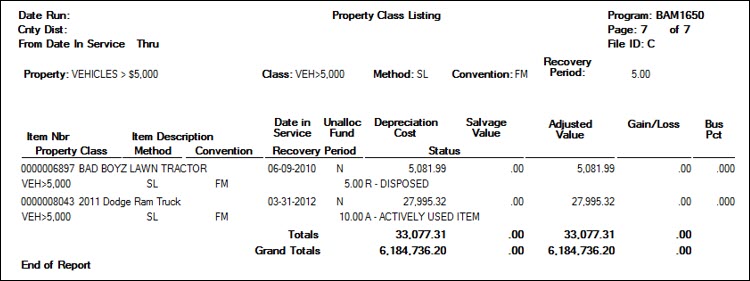
Generate the following reports to verify data and balance totals for the year. The report totals should match.
Asset Management > Reports > Asset Management Reports > BAM1100 - Auditor Analysis Report
The ending balances should match the Auditor's totals. Always Print the Error Report with the Auditor’s Analysis to review issues. Verify these items are coded correctly, if so, the errors are OK.

Asset Management > Reports > Asset Management Reports > BAM1150 - Capital Assets/Inventory Listing

Asset Management > Reports > Asset Management Reports > BAM1650 - Property Class Listing
The Grand Total should match the above reports.
- If report totals match, perform depreciation calculations.
If report totals match, perform depreciation calculations
Asset Management > Depreciation > Depreciation Calculations > Calculations
If the Capital Asset Listing, Auditor’s Analysis, and Property Class reports are correct/balanced and you have reviewed the Requirements for Depreciation Calculations Checklist, perform your depreciation calculations for the year.
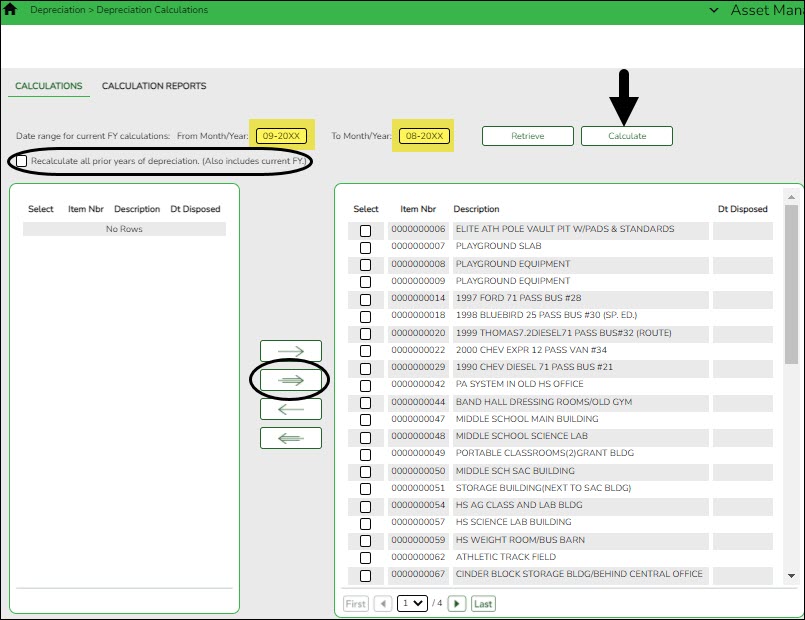
Use the arrow buttons to move inventory items to the right side of the page.
❏ Click Calculate to calculate the depreciation of all selected inventory numbers. A message is displayed prompting you to create a backup.

❏ Click Yes. A pop-up window is displayed with the export file name.
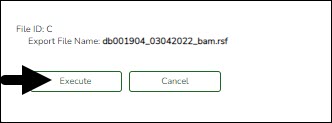
❏ Click Execute. A pop-window is displayed prompting you for a password for the archive.

❏ Enter the password and click OK. Continue the process to save the file in the appropriate location.
❏ Print the report and verify that the new items are listed for depreciation calculations before you process. Other Depreciation Reports are listed in Reports menu.
❏ Select Recalculate all prior years of depreciation (Also includes current FY.) check box to recalculate the depreciation of the selected assets for all years in service. If not selected, then the depreciation is only calculated for the current fiscal year.
If necessary, you can run the depreciation calculations screen multiple times. For example, if you added an item that should have been depreciated in a previous year, you can select the recalculate option and it will retro process calculations. Be sure to keep your auditors informed about which items are involved.
If you receive an error report when you calculate the depreciations, review the report and reconcile any issues prior to continuing this process.
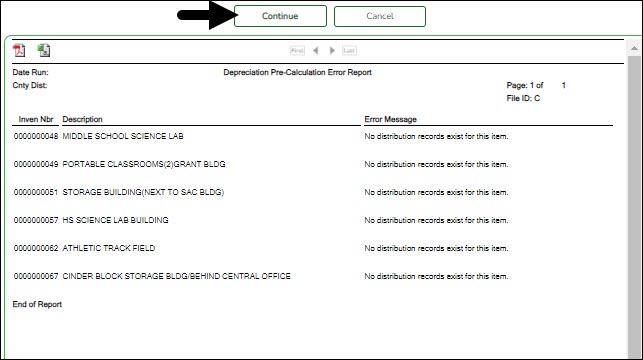
❏ Click Continue. The Depreciation Calculation Item Summary Report is displayed.
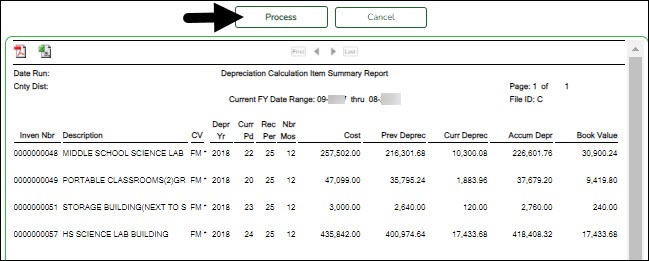
❏ Click Process to continue. - If requested by auditor, generate the Depreciation Detail Schedule report.
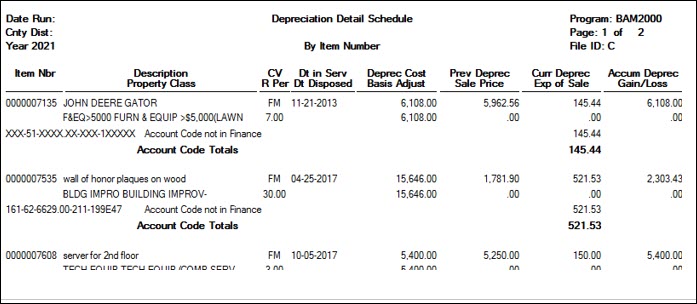
If requested by auditor, generate the Depreciation Detail Schedule report
Asset Management > Depreciation > Depreciation Calculations > Calculation Reports
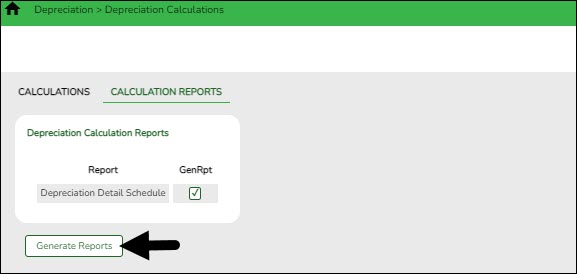
❏ Select Gen Rpt to generate the Depreciation Detail Schedule report. Click Generate Reports.
- Run the Historical Depreciation Schedule Inquiry
Run the Historical Depreciation Schedule Inquiry
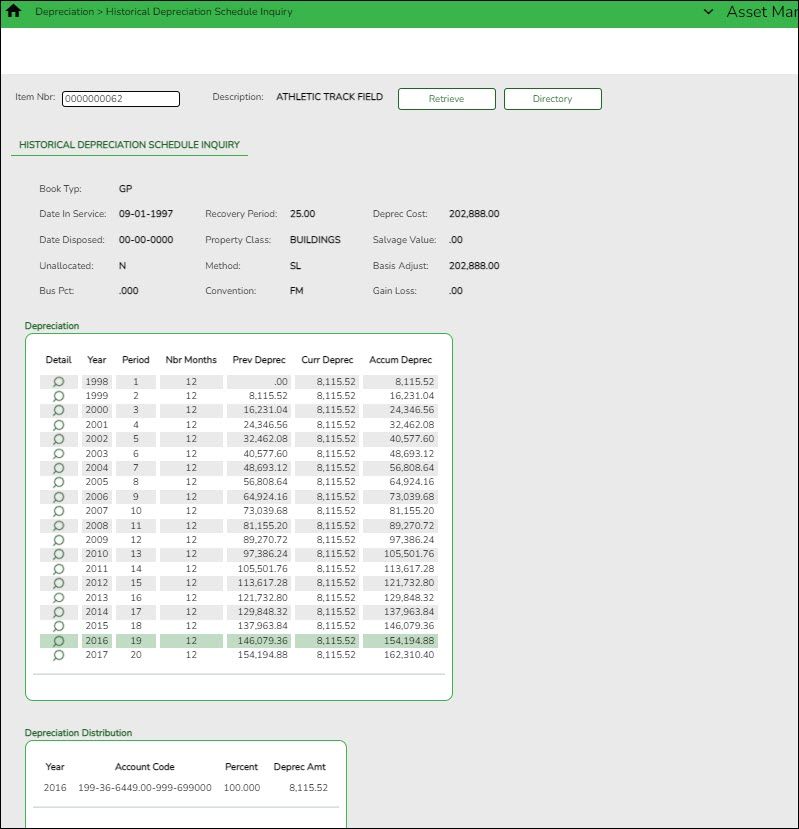
Asset Management > Depreciation > Historical Depreciation Schedule Inquiry
Use this inquiry as an easy way to view when depreciation started and what years have been calculated.
Prepare for New Year Processing
Asset Management
- Verify current and next fiscal years exist in fiscal year table.
Verify current and next fiscal years exist in fiscal year table
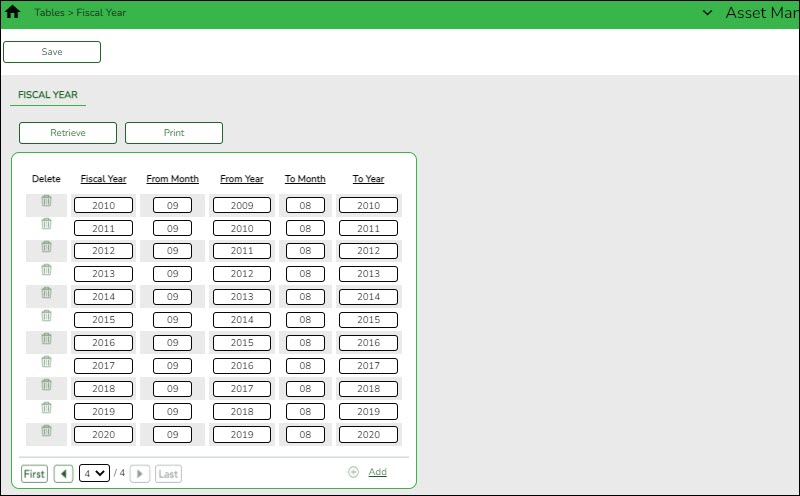
Asset Management > Tables > Fiscal Year
Verify that the current fiscal year and the next fiscal year are listed.
- Copy current file ID (C) to new file ID for historical purposes.
Copy current file ID (C) to new file ID for historical purposes
Asset Management > Utilities > Copy Current to New File ID
Copy the current file ID (C) data into the new historical file ID. This process allows you to copy data that currently exists in file ID C to a new file ID, which will serve as your prior year historical file.

If you need to update any information, you must log on to the new file ID through the Change File ID function and manually make the modifications.
Note: Changes made in one file ID do not update in the other file ID.
After copying data to the historical ID, you can begin making changes as needed to your new current file ID.
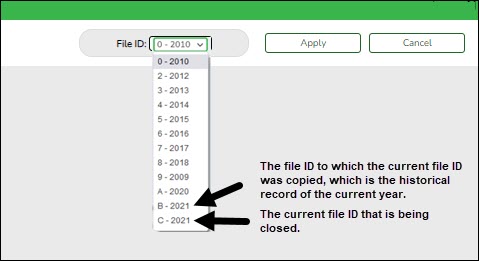
Verify that you are in file ID C before completing the following steps.
- Roll over depreciation distribution funds.
Roll over depreciation distribution funds
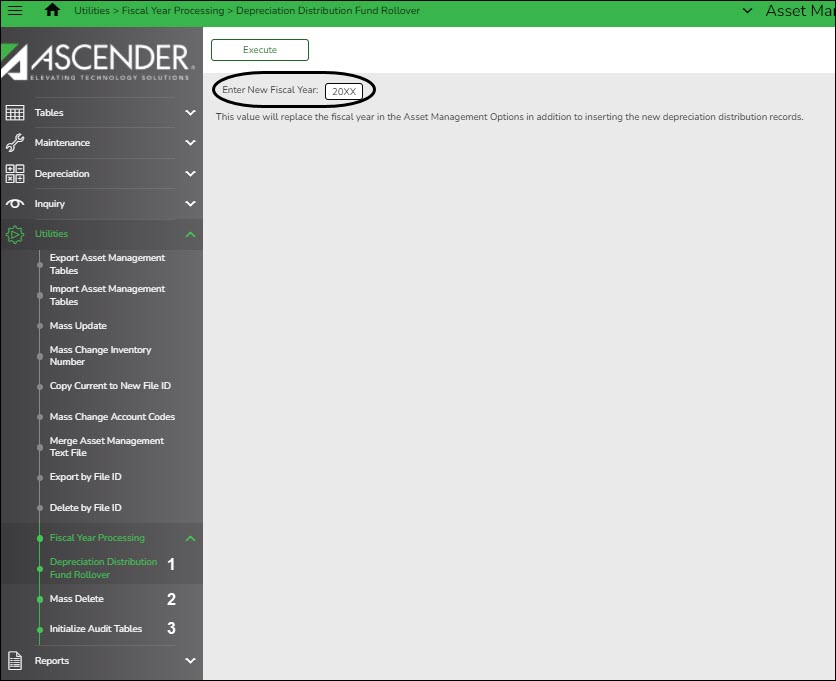
Asset Management > Utilities > Fiscal Year Processing > Depreciation Distribution Fund Rollover
This utility allows you to create new depreciation distribution records and update the fiscal year of the general ledger account codes in the depreciation distribution records. Capital asset records that are selected must meet the following criteria:
- They must exist in the current logged-on file ID.
- They must exist in the current fiscal year, as compared to the Asset Management Options table.
- They must not have been fully depreciated.
- They must not have been disposed of.

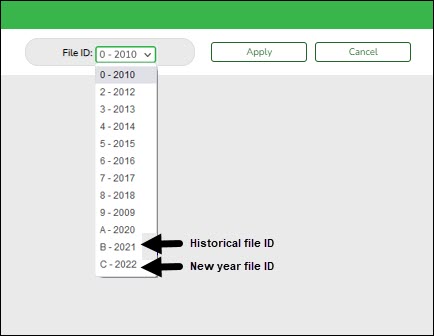
If you check your dropdown of available file IDs now, you will see the new year has been created in this step.
- Mass delete asset items deleted, sold, or entered in error.
Mass delete asset items deleted, sold, or entered in error
Asset Management > Utilities > Fiscal Year Processing > Mass Delete
Mass delete all records that have status codes associated with the item being deleted, sold, or entered in error. This process will delete those records from the current year file ID; however, the items will still be available in your prior year file ID(s).
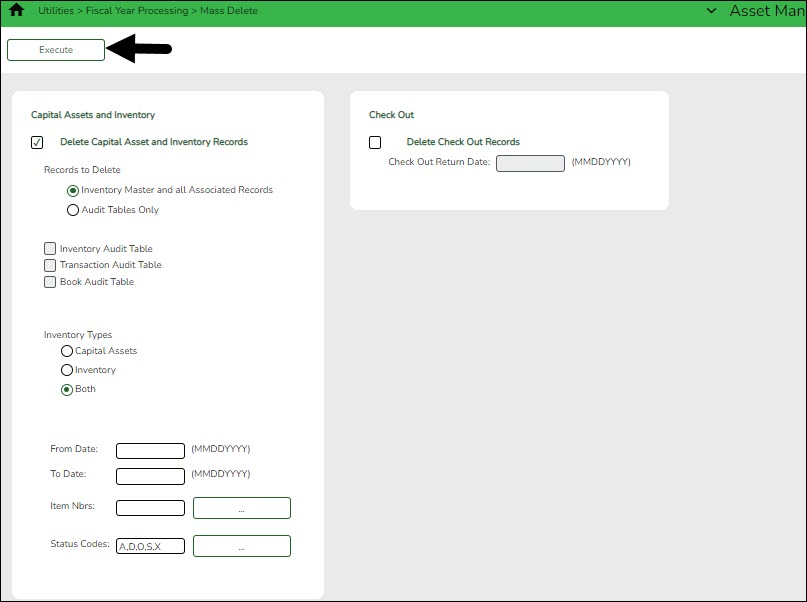
❏ Select Delete Capital Asset and Inventory Records.
❏ Under Records to Delete, select Inventory Master and all Associated Records.
❏ Under Inventory Types, select Both.
❏ In the Status Codes field, click to include the status codes from your LEA's Status Codes table that would warrant removing an item from your current year inventory.
❏ Click Execute. The Mass Delete Preview report is displayed.
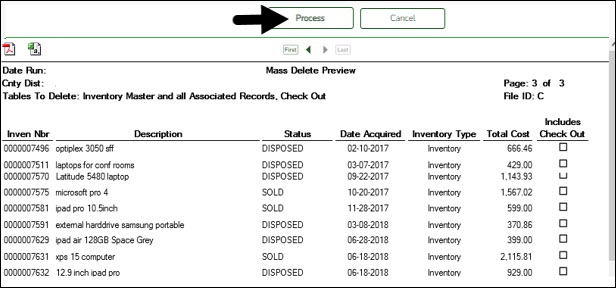
❏ Review the report and click Process. A message is displayed prompting you to create a backup.

❏ Click Yes. A pop-up window is displayed with the export file name.

❏ Click Execute. A message is displayed indicating that the process was completed successfully. Click OK. - Initialize audit tables.
Initialize audit tables
Asset Management > Utilities > Fiscal Year Processing > Initialize Audit Tables
This utility should be run after the auditor has completed their review. This process allows you to delete all selected historical audit files based on the file ID.
It is best practice to create a backup of your files prior to running this utility as this process does modify files.
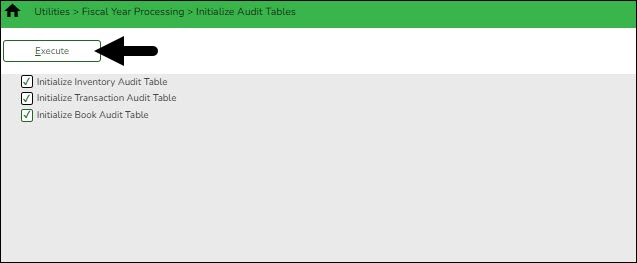
❏ Select all three options on the page.
❏ Click Execute. A message is displayed prompting you to create a backup.

❏ Click Yes. A pop-up window is displayed with the export file name.

❏ Click Execute and save the file in the appropriate location. A message is displayed prompting you to continue with the process. Click Yes. A message is displayed indicating that the process was successfully completed. Click OK. - Create export of file ID C.
Create export of file ID C
Asset Management > Utilities > Export by File ID
Create an export of file ID C as a backup of the beginning new year database. Save the file and record the file name for future reference if needed (e.g., Export File ID C Beginning Year XX-XX)
This is a backup of your LEA's new year inventory without any maintenance.
After completing the above steps, you are now ready to begin the new fiscal year for Asset Management.
Americans with Disabilities Act (ADA) and Web Accessibility
The Texas Computer Cooperative (TCC) is committed to making its websites accessible to all users. It is TCC policy to ensure that new and updated content complies with Web Content Accessibility Guidelines (WCAG) 2.0 Level AA. We welcome comments and suggestions to improve the accessibility of our websites. If the format of any material on our website interferes with your ability to access the information, use this form to leave a comment about the accessibility of our website.


