Teacher Guide to ASCENDER TeacherPortal
Long-Term Substitute Teachers
Long-term substitute teachers can be granted access to use TeacherPortal on behalf of a teacher who is away for an extended period of time. When substitute teachers log in to TeacherPortal, they can select the teacher for whom they are substitute teaching. Then, the substitute teachers can proceed to use TeacherPortal as the teacher.
Before a long-term substitute teacher can access TeacherPortal, a substitute teacher record must already exist for him in TeacherPortal. These steps are covered in the TeacherPortal Administrator guide.
Create an ASCENDER TeacherPortal account.
A long-term substitute teacher must create a TeacherPortal account in order to log on to TeacherPortal. Substitute teachers will log on to TeacherPortal with their own accounts, rather than with the teacher’s account.
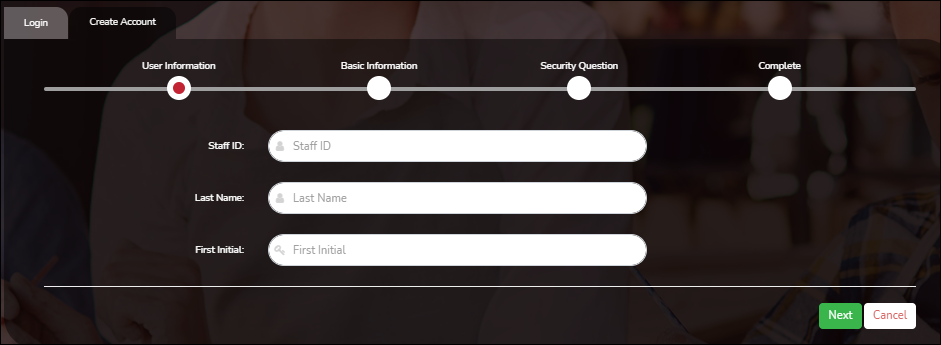
❏ From the Login page, click Create Account. The User Information page is displayed.
To exit without saving any changes, click Return to Login.
User Information:
| Staff ID | Type your staff ID number. |
|---|---|
| Last Name | Type your last name |
| First Initial | Type the first letter of your first name. |
❏ Click Next.
If you entered the data correctly, the Basic Information step opens.
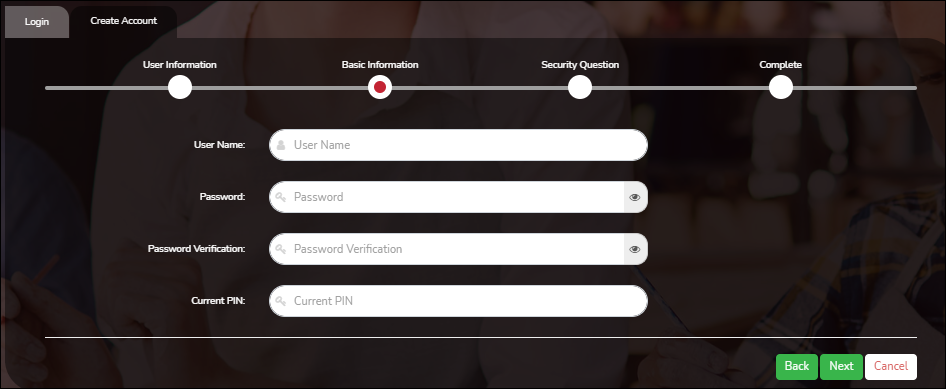
Basic Information:
| User Name | Type a unique user name that will identify you when you log on to the system, such as a combination of letters from your first and last name.
• Your user name must be 6-25 alphanumeric characters and must be unique within the district. |
|---|---|
| Password | Type a password that you will use when you log on to TeacherPortal.
• The password must be 16-46 characters using three of the following: uppercase letters, lowercase letters, numbers, and special characters |
| Password Verification | Retype the password exactly as you typed it above. This step confirms that you typed your password as you intended. |
| PIN | Type a four-digit numeric personal identification number (PIN) that you will use when you post data in TeacherPortal. Avoid using 1234, 4321, or all the same number, as these are common and easily guessed. |
❏ Click Next.
If you entered all required data correctly, the Security Question step opens.
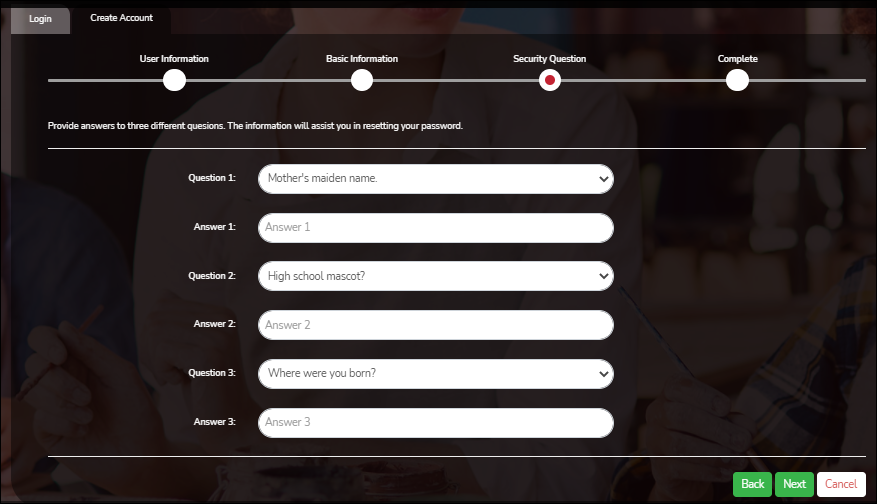
Security Question:
| Question | Select three questions to which you will provide an answer. The questions are asked in the event that you forget your password. You must select three different questions. You cannot repeat any questions/answers. |
|---|---|
| Answer | Type the answer to each question. If you forget your password, you will be required to answer the question correctly in order to recover your account. Be sure to select questions for which you will easily remember your answer. Answers are case sensitive. |
License Agreement
Review and accept the End User License Agreement (EULA) for ASCENDER. This agreement must be accepted in order to proceed.
❏ Select Accept.
❏ Click Next.
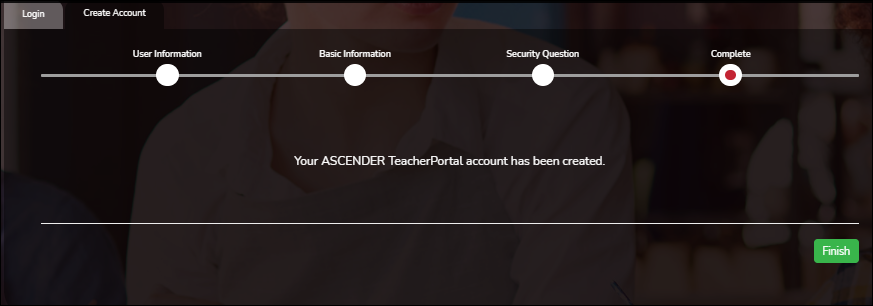
❏ Click Finish.
The Announcements page opens.
Substitute teachers must log on using their own credentials.
If you are continuing from the previous step and are already logged on, you can skip this step.
If you are not already logged on, you must log on to TeacherPortal using the user name and password created in the previous step. Once you are logged on, you can access the pages for the remaining steps.
| User Name | Type your user name. Your user name is not case-sensitive. |
|---|---|
| Password | Type your password. The typed text is hidden. Your password is case sensitive. |
❏ Click Login.
The Announcements page is displayed.
For security purposes, your password will expire periodically. If your password is expired, you are redirected to the Password Expired page before the Announcements page is displayed. Follow the instructions provided in the online Help for the Password Expired page.
When you log in to TeacherPortal, the Announcements page is the first page displayed. From here, you must specify the teacher you are substitute teaching for. You must select the teacher each time you log in.
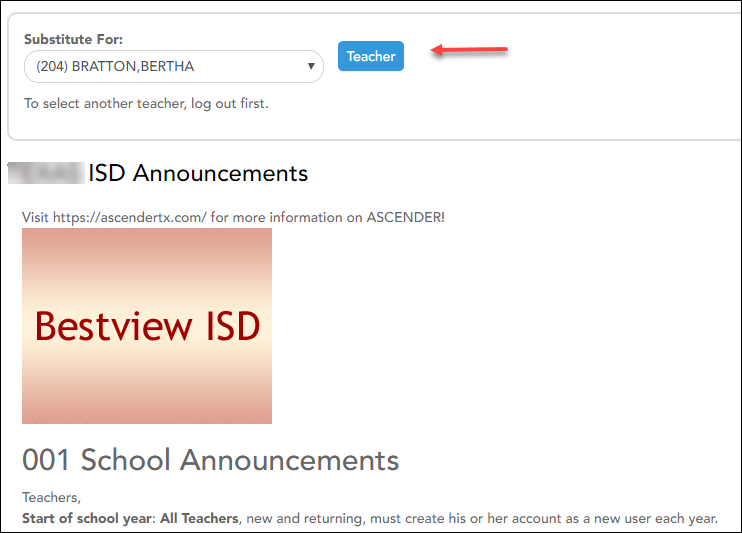
❏ In the Substitute For field, select the teacher you are substitute teaching for.
• Only teachers you are assigned to teach for are listed.
• The beginning and ending dates also determine which teachers are listed.
If the beginning date is in the future, the teacher is not listed until the current date is within the range of dates specified. Once the current date is past the substitute’s ending date, the teacher is no longer listed.
❏ Click Teacher.
A message is displayed indicating that you are now substitute teaching for the selected teacher. The teacher's three-digit control number is also provided.
NOTE: Once you have selected a teacher, the Update Profile page is no longer available. See the Update Profile Settings section below for information about how to update your profile settings.
❏ To select another teacher, you must log out, and log in again.
Use TeacherPortal as the teacher.
When logged in as a long-term substitute teacher, you can maintain and print most data that the teacher would be able to access, including attendance, assignments, grades, discipline, and reports.
For assistance with these pages, view the online Help for each page.
As you update and post data in the database tables, be aware that the teacher’s name will be associated with some actions, and the substitute teacher’s name will be associated with other actions.
• If you mark grades as ready to post, the teacher’s name is reflected.
• If you post attendance, the teacher’s name is reflected.
• If you enter a discipline referral, the substitute’s name is reflected.
Update profile settings as needed.
Once you have selected a teacher from the Announcements page, the Settings > Update Profile page is no longer available.
❏ If you need to make changes to your profile, you must log out, and then log in and access the Update Profile page before selecting a teacher.
For assistance with the fields on the page, view the online Help.
Reports:
Generate seating chart report.
This report prints a teacher's seating charts for all periods or one period. For each period, the seating chart is displayed followed by a list of students who are not assigned to seats. The seating chart lists the student name, gender, and ID.
If printed for all periods, each period prints on a separate page.
NOTE: If that field has been changed, and the seating charts have not been re-saved on Settings > Manage Charts since the setting was changed, a warning message is displayed when the report is generated indicating that the reports will not be accurate until the Manage Seating Charts page has been re-saved. You must review the seating chart for each period on the Manage Seating Charts page, make any necessary changes, and then re-save each chart.
❏ Specify report options:
| Semester | The current semester is displayed. You can select a different semester. | ||||
|---|---|---|---|---|---|
| Period | Select the period-course(s) to print the seating chart for, or select ALL CLASSES to print seating charts for all periods. If Combine Courses in Attendance is selected on your Settings > Update Profile page, the courses are combined by period. |
||||
| width | Select the width setting for the report.
For either width setting, you can adjust the orientation when you print. Select Landscape to increase the number of students that fit on the page. |
||||
| Show Pictures | Select to display student photos in the seating chart. Photos are only available if they have been added by the district. |
❏ Click Generate.
- The report opens in a new window, and you can print the report from that window.
- The report selection page remains open on your desktop.
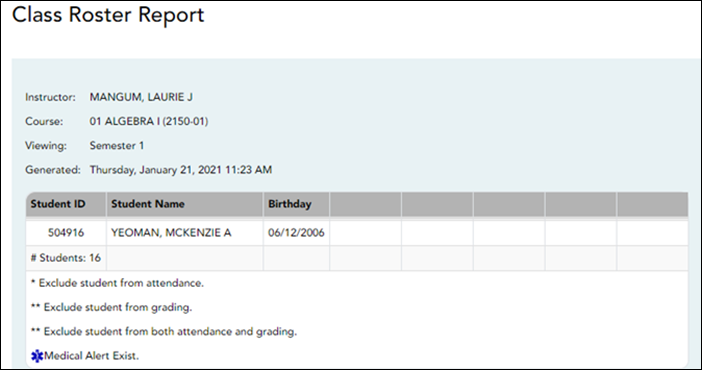
This report provides a blank class roster by semester and course, including a list of students enrolled in the course and up to 50 blank columns. You can choose the sort order and whether to include the student’s birth date and contact information. The report can be exported in CSV format.
If you print the report for a course group, the Course Section column is included allowing you to identify the course-section in which the student is enrolled.
❏ Specify report options:
| Semester | The current semester is displayed. You can select a different semester. | ||||||||
|---|---|---|---|---|---|---|---|---|---|
| Course-Section | Select the course-section and period for which to print the report. The drop down lists the two-digit period and course name. The course number and section number are in parentheses. If course groups have been created on the Course Grouping page, the groups are listed as well as the individual courses. |
||||||||
| Columns | Type the number of blank columns to display on the report, up to 50. | ||||||||
| Display Options |
|
||||||||
| Sorting Options | Indicate the order in which to sort the report data. You can sort by student name (last name), Student ID, course-section (for course groups), birth date (if included), or custom student order. Custom student order is the order specified for the course-section on Settings > Arrange Student Order. |
❏ Click Generate.
- The report opens in a new window, and you can print the report from that window.
- The report selection page remains open on your desktop.

