User Tools
Sidebar
Table of Contents
academy:parent_enroll_new_student_steps
Book Creator
Add this page to your book
Add this page to your book
Book Creator
Remove this page from your book
Remove this page from your book
This is an old revision of the document!
ASCENDER ParentPortal > My Account
If you are continuing from the previous step, the My Account page is displayed. Otherwise, log on and select My Account from the header menu.
If you have not already verified your email address using the link that was sent to your email address, you must do this now to continue.
IMPORTANT: If you do not have access to an email address, contact your student's campus.
You must provide and verify your email address before you can access features that require your email address.
You can update your email address at any time.
If no email address has been entered, enter the address.
| Email Address | Type your current email address. You cannot enter an email address that is already in use. |
|---|
❏ Click Verify Email.

You will receive an email message at that address containing a verification link.
If you entered an email address when you registered for this ASCENDER ParentPortal account, you should have received an email message in your inbox with a code allowing you to verify your email address.
- If the email has been verified, your email address is displayed.
- If your email address has not been verified, you can click Re-send to send a new code.
❏ To enroll a student who has never been enrolled in the district, click Enroll a New Student.
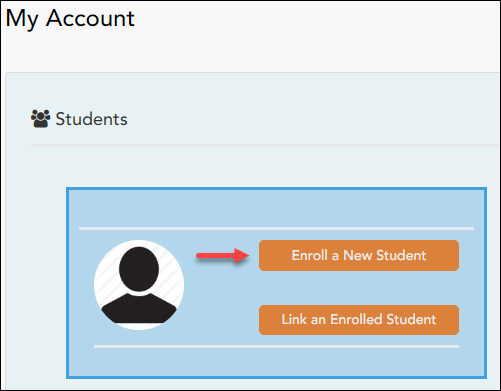
The New Student Enrollment page opens.
ASCENDER ParentPortal > My Account > Enroll a New Student
The New Student Enrollment page allows you to go through the steps required to enroll a new student online using forms provided by the district, and then request an enrollment key which will allow you to complete the New Student Enrollment process.
Step 1 - Student Name:
❏ Enter the student's full name and click Continue.
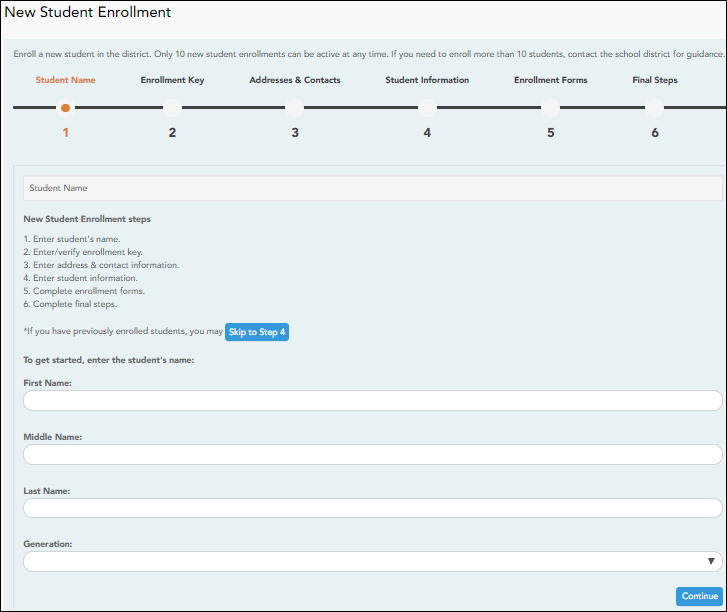
Step 2 - Enrollment Key:
There are two possible methods for requesting an enrollment key. One of the following options will be available, as determined by the district.
- Option 1 - Email Validation
For this option, an enrollment key is sent to you in an email message.
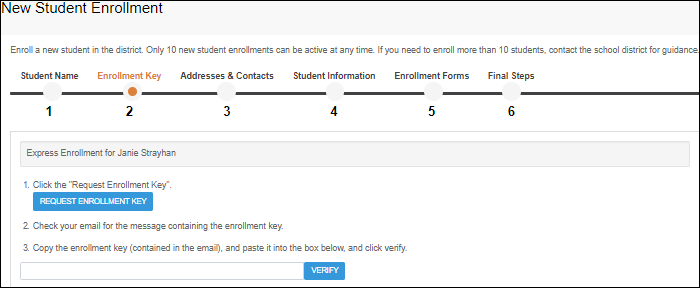
Once you obtain the key, you can enter the key on this page to complete the process. To do this, follow these steps:
❏ Click REQUEST ENROLLMENT KEY to request an enrollment key for your student.A message is sent to your email address that contains the new 16-character student enrollment key.
❏ Check your email inbox for the message that contains the enrollment key.
Enrollment Key You must enter the exact enrollment key in order to complete the enrollment process. The easiest way to enter the code accurately is to copy it from the email message and paste it into the field.
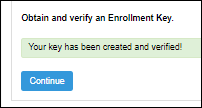
❏ Click VERIFY.If you typed the enrollment key correctly, the message “Your key has been created and verified!” is displayed.
- Option 2 - CAPTCHA Validation
For this option, a key is generated once you correctly enter the CAPTCHA code. To do this, follow these steps:
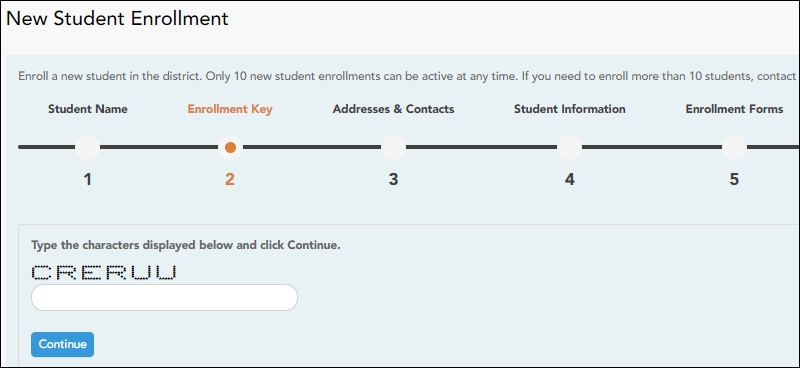
This option is primarily used during a short-term enrollment event, such as Kinder Roundup.
❏ Type the CAPTCHA code exactly as it appears on the page.
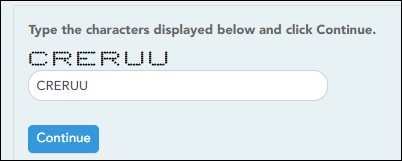
❏ Click Continue.
❏ Click Continue.
Step 3 - Addresses & Contacts:
Step 3 allows you to add physical addresses and mailing addresses for the student, family members, and other contacts.
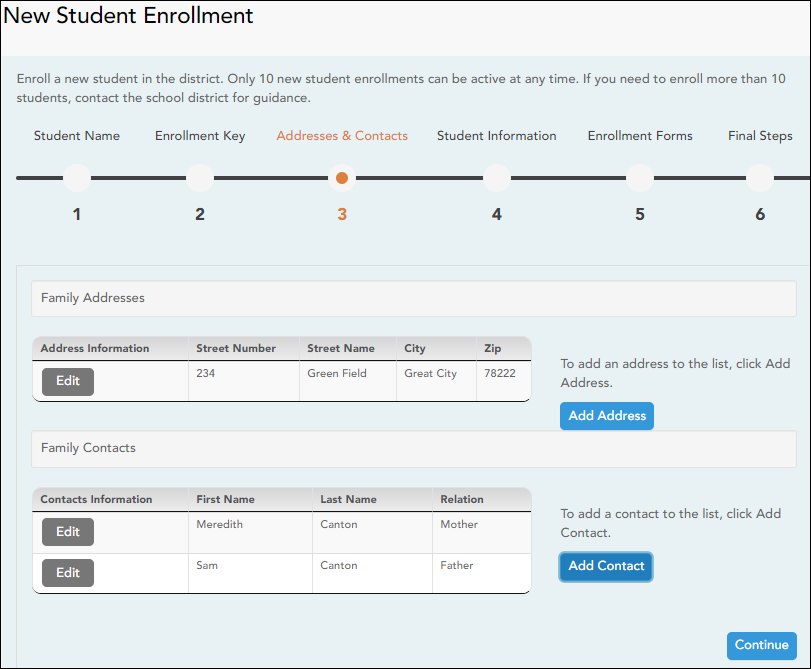
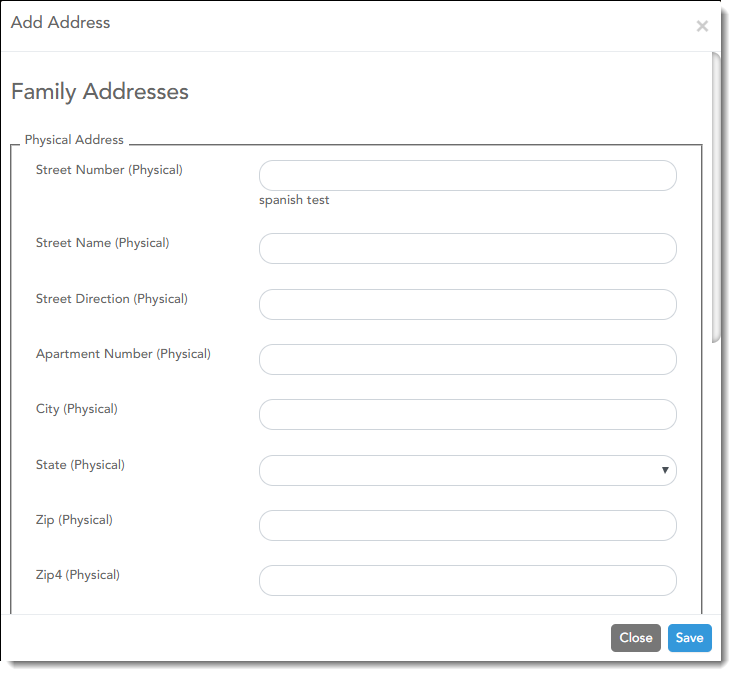
| Family Addresses | Any existing addresses for the student and family are listed. You can enter multiple sets of addresses if needed. Add address: ❏ Click Add Address to add an address.
❏ Type the complete address in the fields provided.
❏ Click Edit next to the address to edit an existing address. The Add Address window opens.
❏ Update the fields as needed. |
|---|
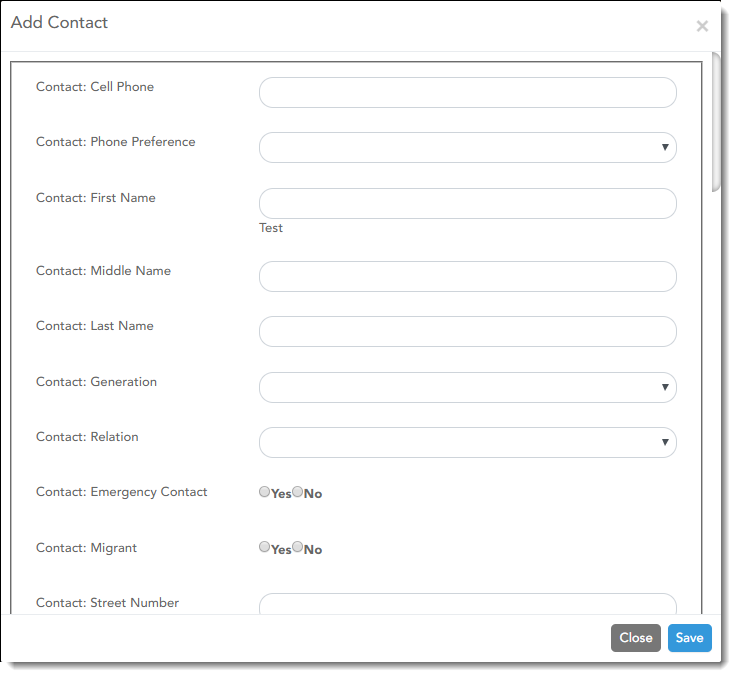
| Family Contacts | Existing contact information for all of the student's family and emergency contacts. Add up to seven contacts as needed. Add a contact: ❏ Click Add Contact to add a contact.
❏ Enter data in the fields, including the contact's complete name and address.
❏ Click Edit next to the contact's name. The Add Contact window opens.
|
|---|
❏ Click Continue.
Step 4 - Student Information:
Any existing students added to your account are listed.
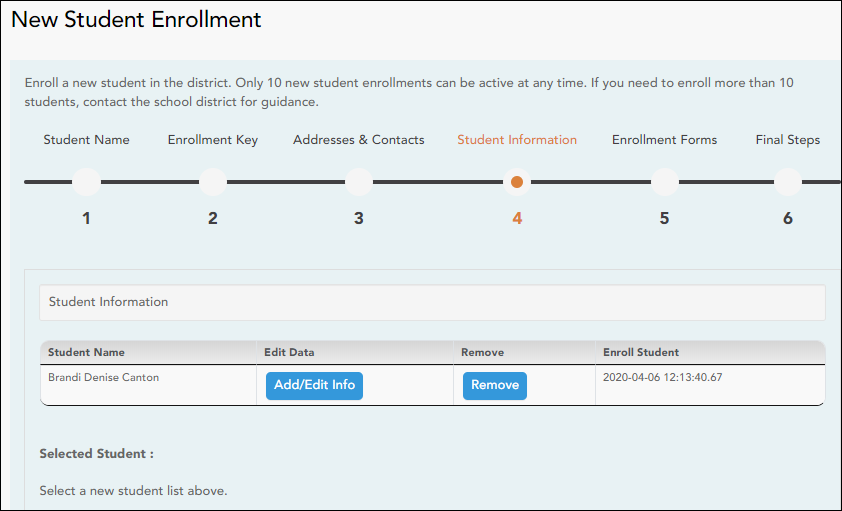
❏ Click Add/Edit Info for the student.
The page is re-displayed allowing you to select the student's address and contacts and enter additional information for the selected student.
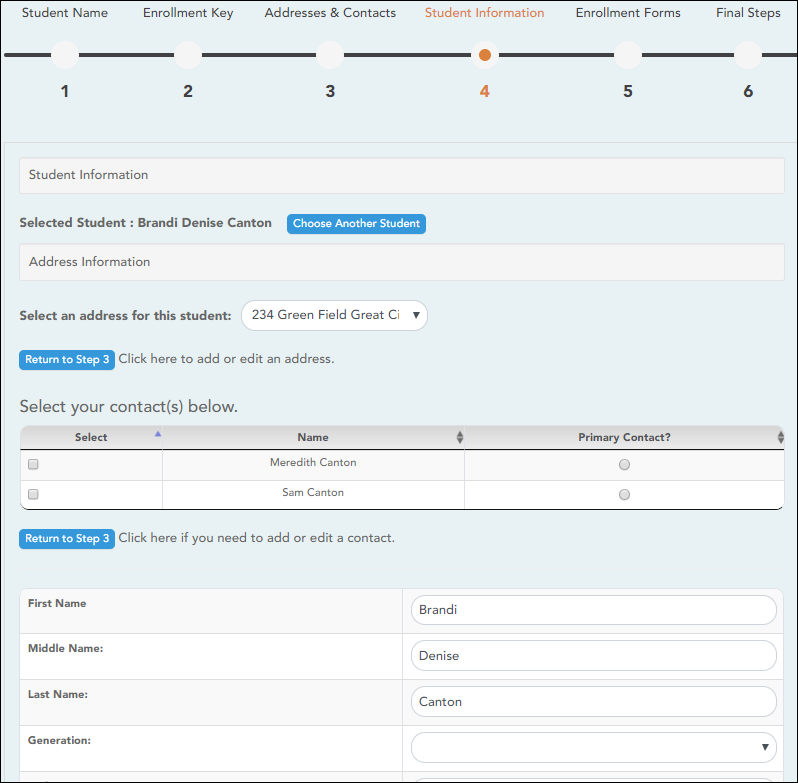
| Student Information | The name of the selected student is displayed. Click Choose Another Student to enter data for a different student. |
|---|---|
| Address Information | Select an address for the student from the drop-down list. These are the addresses entered in Step 3. If you need to add another address, you can click Return to Step 3 to add another address, and then return to Step 4. |
| Select your contact(s) below | Select contacts for the student from those entered in Step 3:
• From the list of contacts, select up to seven who should be listed as contacts for the student.
|
| student demographic information | Enter student demographic data in the fields provided. |
Attach a document:
If a field contains the Document button, you can click the button to upload a file related to online enrollment, such as a birth certificate, driver license, immunization record, or proof of residency.
A window opens allowing you select and upload one or more files.
| Document Upload | Click Choose File. Locate and select the file to be uploaded. The following file types are acceptable:
• PDF |
|---|---|
| Description | Type a description of the file you are uploading. |
❏ Click Upload File.
A message is displayed indicating that the file upload was successful, and the details are displayed.
❏ Click Close to close the window.
 - If a document has been uploaded for a particular field, the button displays Documents(+) (with a plus sign).
 - If no document has been uploaded for the field, the button displays Documents(-) (with a minus sign).
View or delete an existing document:
❏ Click Documents(+).
❏ Click Save and Continue.
❏ Or, click Save and Continue Later if you have not completed all information and need to continue at a later time. A message is displayed indicating that the data is saved but not submitted for district processing. You can return at a later time to complete the process.
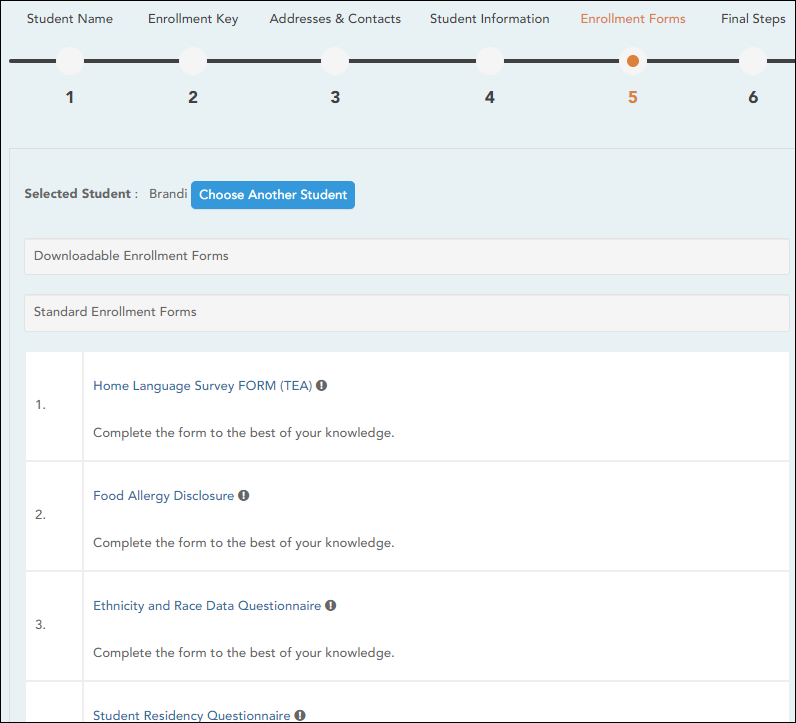
Step 5 - Enrollment Forms:
❏ Under Downloadable Enrollment Forms:
Any additional forms required by the campus or district are listed.
(If you are unable to submit forms online, they can be printed: Download Standard Forms (optional):)
❏ Click each form to view it. The form opens in a new window where it can be viewed and printed.
❏ Print and complete all forms by hand, and take the completed forms to the campus or district if required.
❏ Under Standard Enrollment Forms:
The required standard forms are listed. These forms can be completed and submitted online. Icons next to the form name indicate if you have completed the form:
 - Indicates that the parent has not saved the form.
 - Indicates that the parent has already saved the form.
❏ Click each form to view it.
The form opens in a pop-up window.
❏ Enter the required information and click Save Changes.
You cannot save a form unless all required data is entered.
NOTE: Some forms do not have data entry fields, but do need to be acknowledged by the parent. In this case, the click Save Changes to acknowledge the contents of the form.
Until all forms are saved, the Enroll Student button remains disabled. (You may need to scroll down to view the Enroll Student button.)
❏ Click Enroll Student when all data and forms are ready.
The student’s enrollment information is submitted to the district for review and acceptance. You will also receive a confirmation notice by email.
Step 6 - Final Steps:
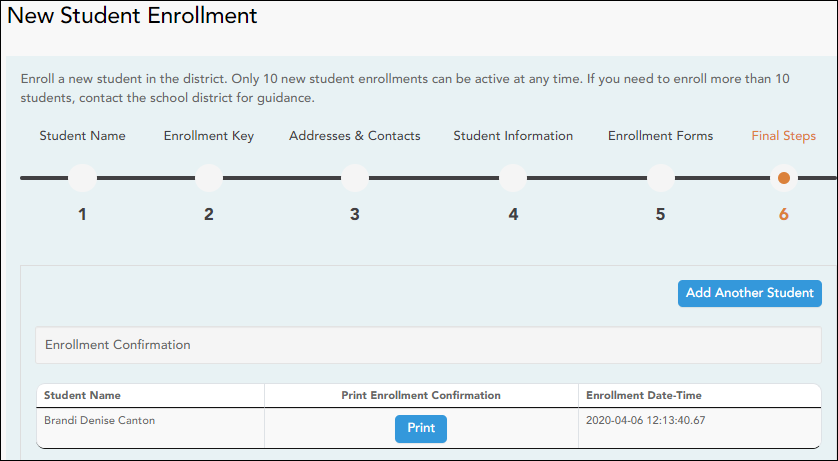
❏ Click Add Another Student if you need to enroll another student, and repeat the process from Step 1.
Under Enrollment Confirmation:
All students are listed whom you have successfully submitted to the district for enrollment, or are in the process of enrolling.
- If you have started the enrollment process for the student, the student's name is displayed.
- If his enrollment has successfully been submitted to the district, the submission date-time stamp is displayed.
❏ (Optional) Click Print to print a confirmation message for each enrolled student.
The message contains the student’s name, student enrollment key, and further instructions for your records.
What Happens Next?
Visit in person:
To complete the enrollment process, it may be necessary to go to the district or campus to deliver the downloadable forms and complete any steps that must be handled in person, as required by the district and campus. Contact your campus for these instructions.
Receive a ParentPortal ID:
Once the district or campus has completed your student's enrollment, the campus will issue you a ParentPortal ID for each student you successfully enrolled. You can use the portal ID to add the student to your account.
Once your student is completely enrolled and added to your account, he will be listed on your My Account page under Students.
academy/parent_enroll_new_student_steps.1562935225.txt.gz · Last modified: 2019/07/12 07:40 (external edit)
Except where otherwise noted, content on this wiki is licensed under the following license: CC Attribution-Share Alike 4.0 International
Americans with Disabilities Act (ADA) and Web Accessibility
The Texas Computer Cooperative (TCC) is committed to making its websites accessible to all users. It is TCC policy to ensure that new and updated content complies with Web Content Accessibility Guidelines (WCAG) 2.0 Level AA. We welcome comments and suggestions to improve the accessibility of our websites. If the format of any material on our website interferes with your ability to access the information, use this form to leave a comment about the accessibility of our website.


